
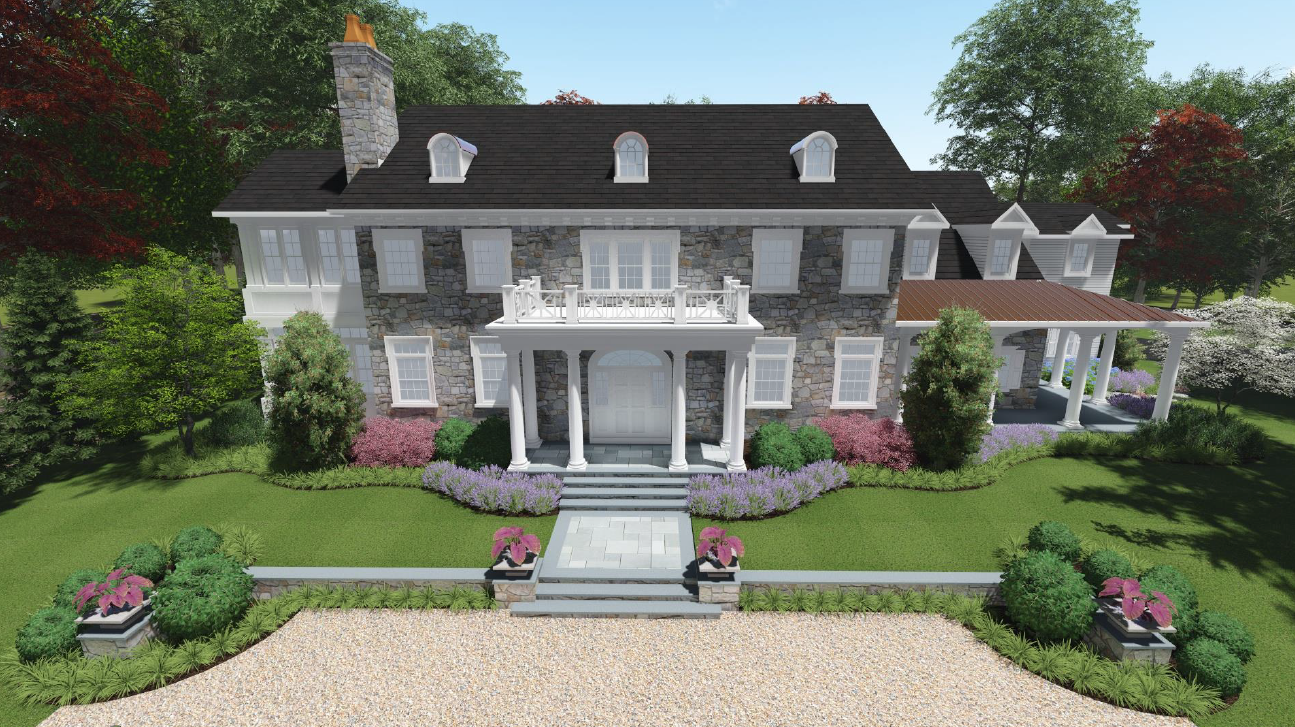
An early rendering of the Benjamin Street home with a white railing above the front door porch.
If you glance back at some of the Special Project blog posts, you’ll see several welding projects BlackRock has done in the past. I shared our earlier projects of rebuilding a landscaping trailer and a kitchen island, even using our homemade welding table on the latter project that was also presented in previous posts.
Now that I had some experience welding a variety of projects, I was given a new assignment that would require me to repurpose six pieces of a steel railing and turn it into smaller segments of decorative railing that would border the roof of the portico at our home on Benjamin Street.
For those unfamiliar with the term ‘portico’ like me, Dictionary.com defines it as “a structure consisting of a roof supported by columns or piers, usually attached to a building as a porch.”
Since the portico has no upstairs walkout access to serve as a real balcony, the aesthetics of the rail were the key factor rather than a functional hand railing. The portico extends above the front porch and is directly in front of the master bathroom, overlooking the front yard and driveway of the property.

Before I could get started, I had to go out to the property to get proper measurements of where each post was located on the roof so I could identify the length of each rail segment needed. All six of the smaller segments were almost exactly evenly spaced around 3’-10” with a larger centerpiece that measured out a little larger than 8 feet.
The posts are one foot squares that setback around 1’-1” to provide a lip around the portico roof. Take a look at the floor plan layout that shows the placement to get a better visual understanding.
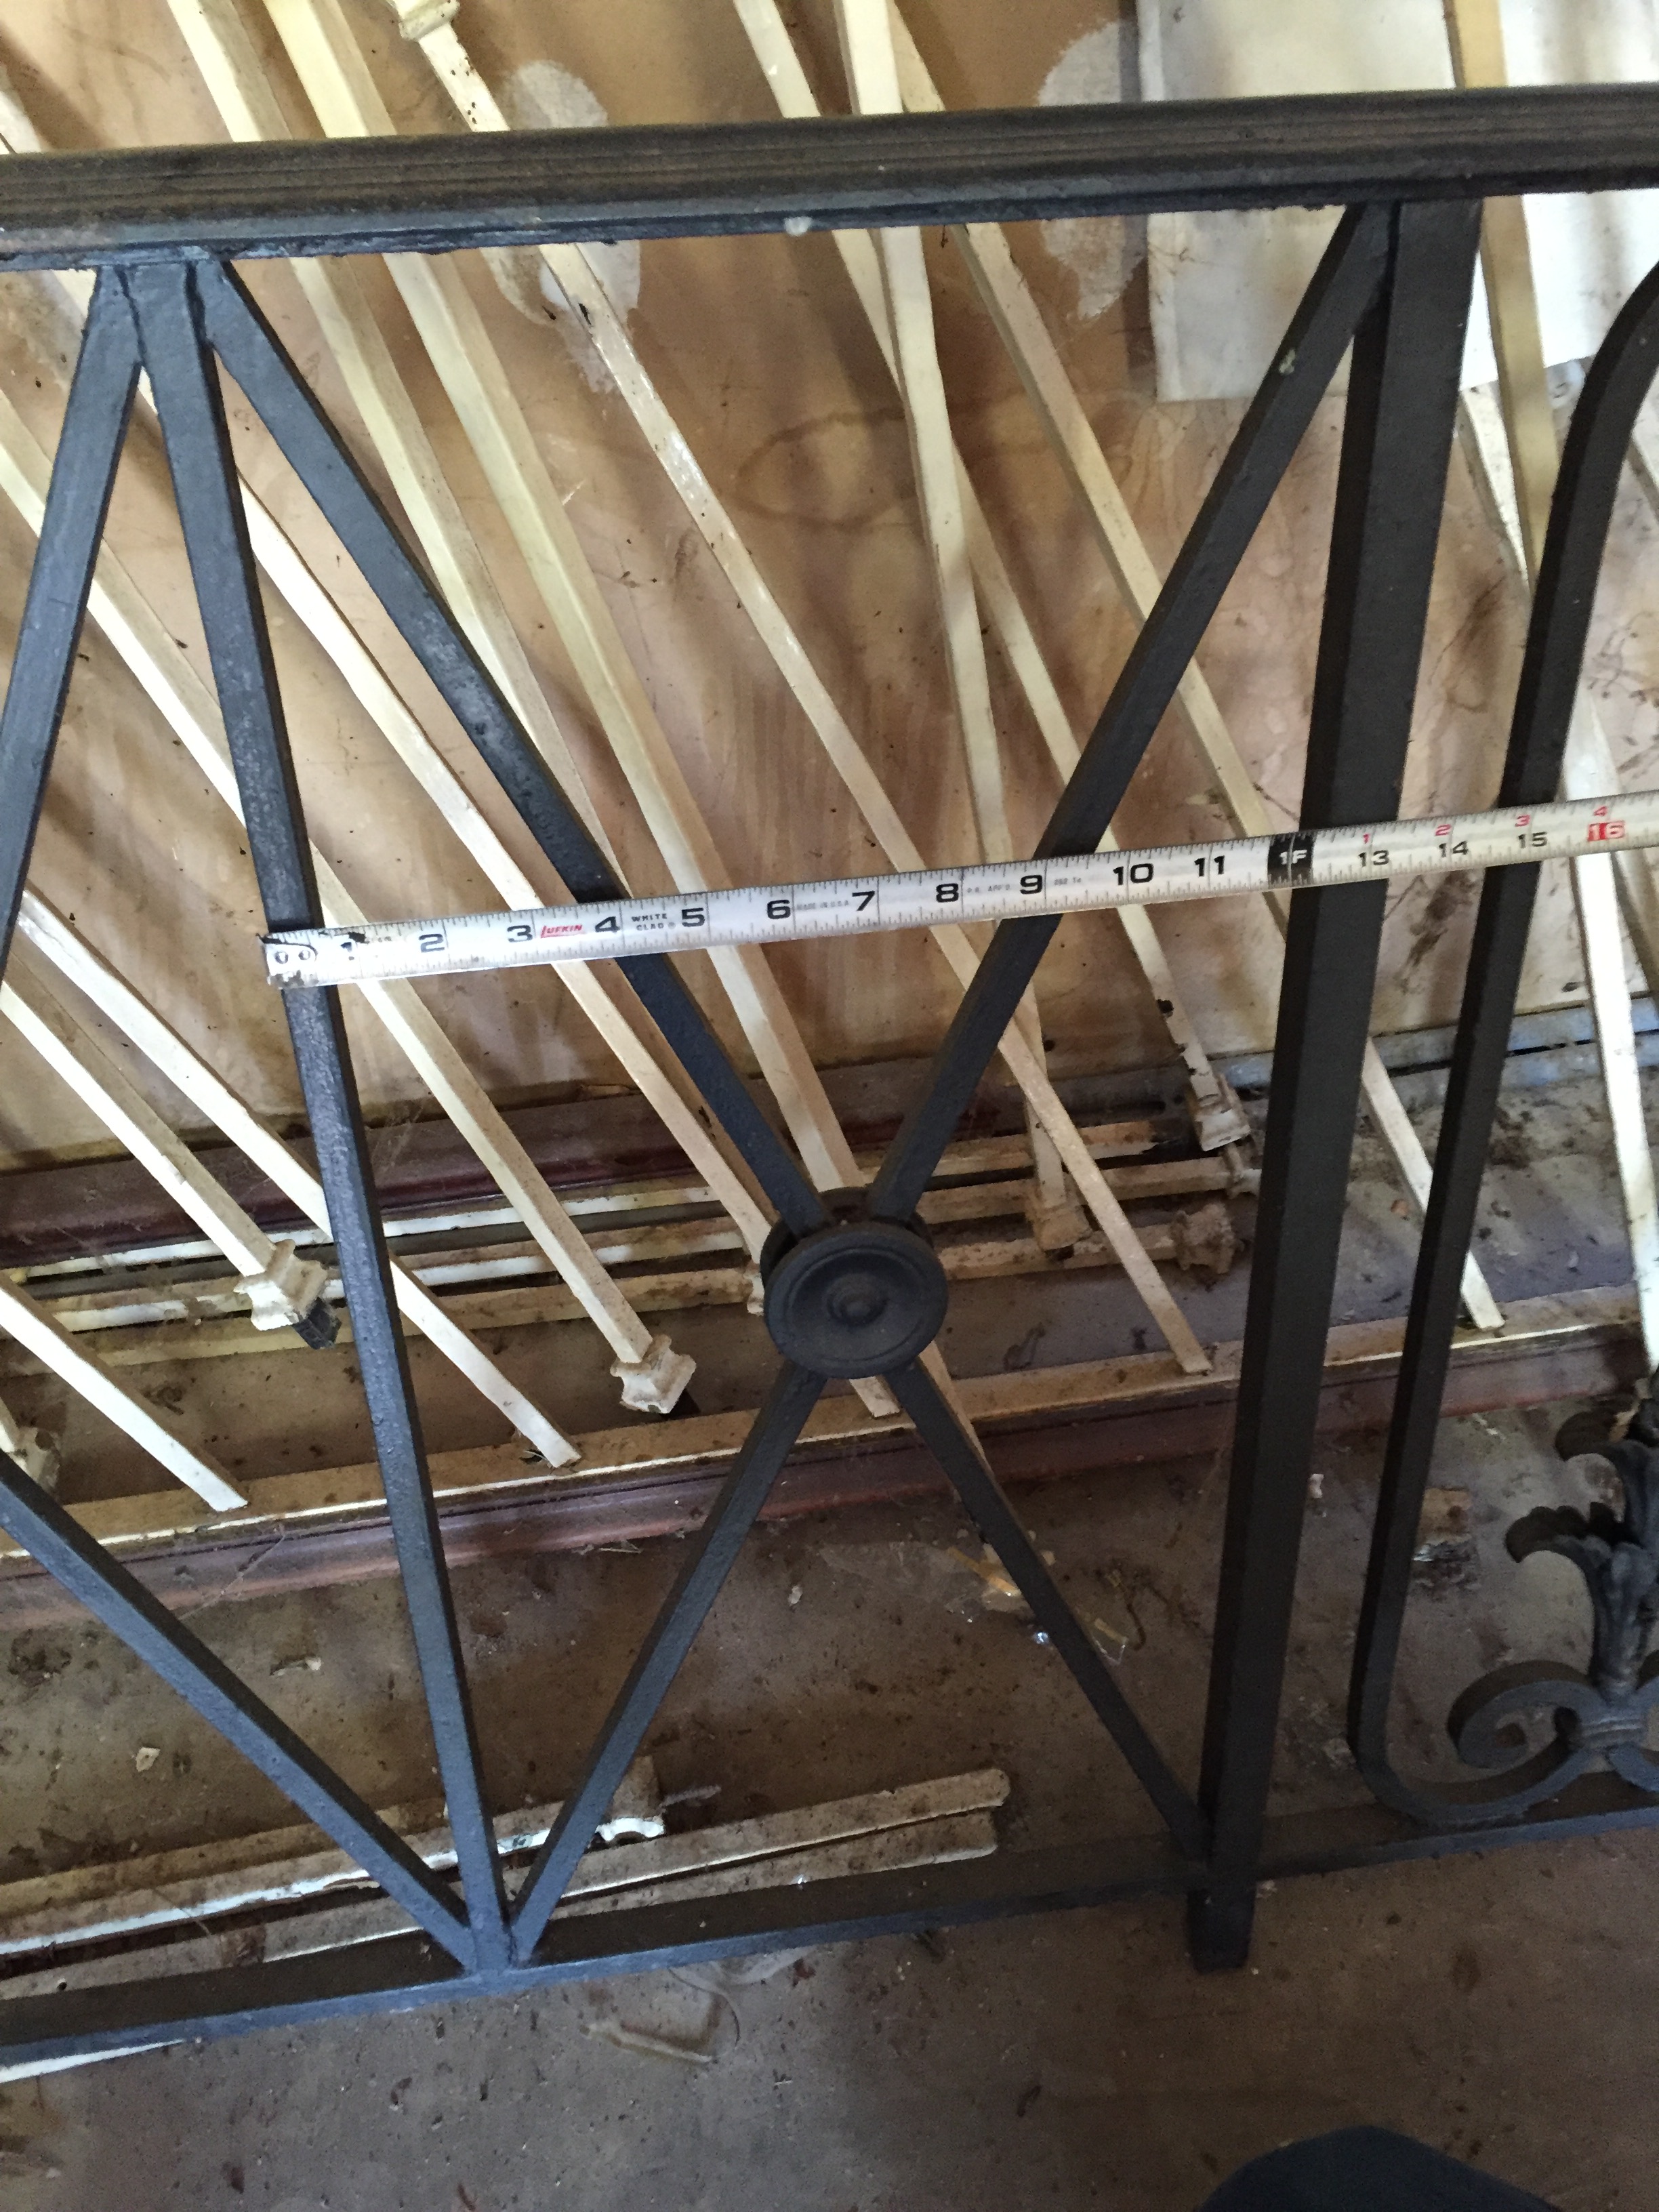
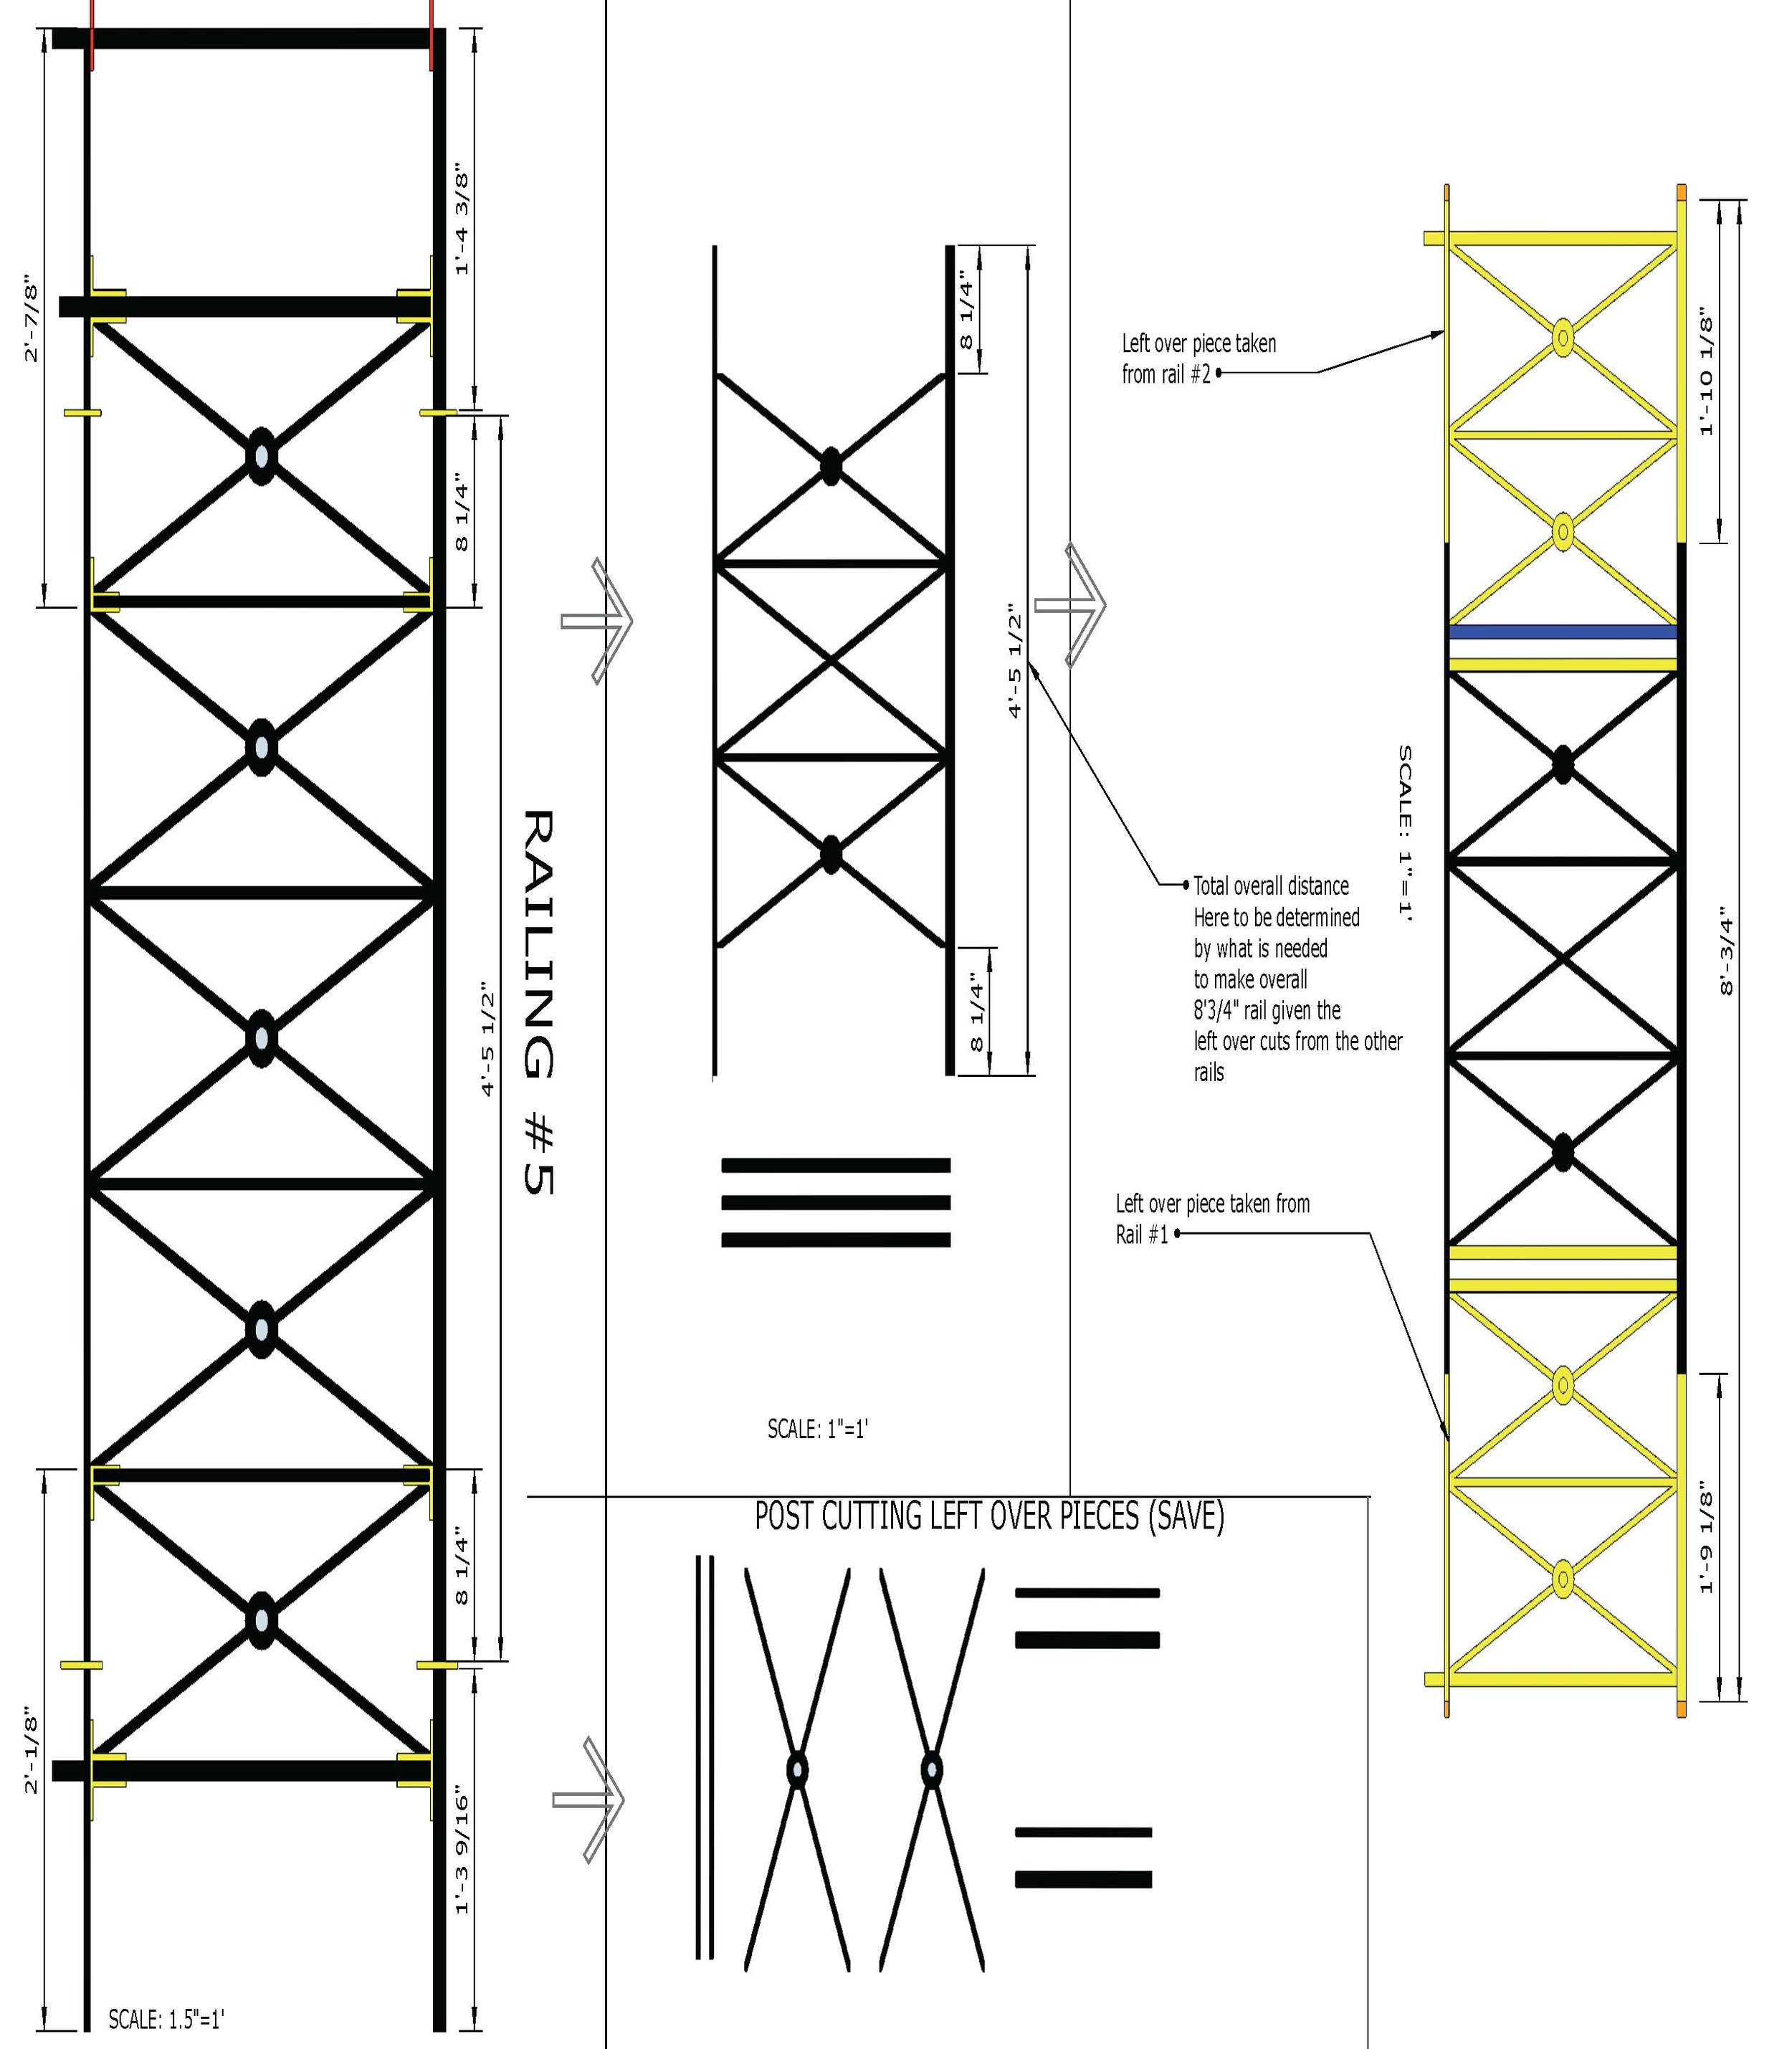
After getting all of the dimensions necessary, it was time to take the existing rails and get precise lengths of each portion to identify the best points to cut the rail that wouldn’t waste other pieces. After getting the numbers, I drew them in Google Sketchup exactly to scale and began to experiment separating the rails at various points to figure out what would work best.


While this process was a bit tedious, there were only so many choices to ensure that every rail matched. I took my layout that I created and inserted very basic 2D railings to show what was required of the segments.
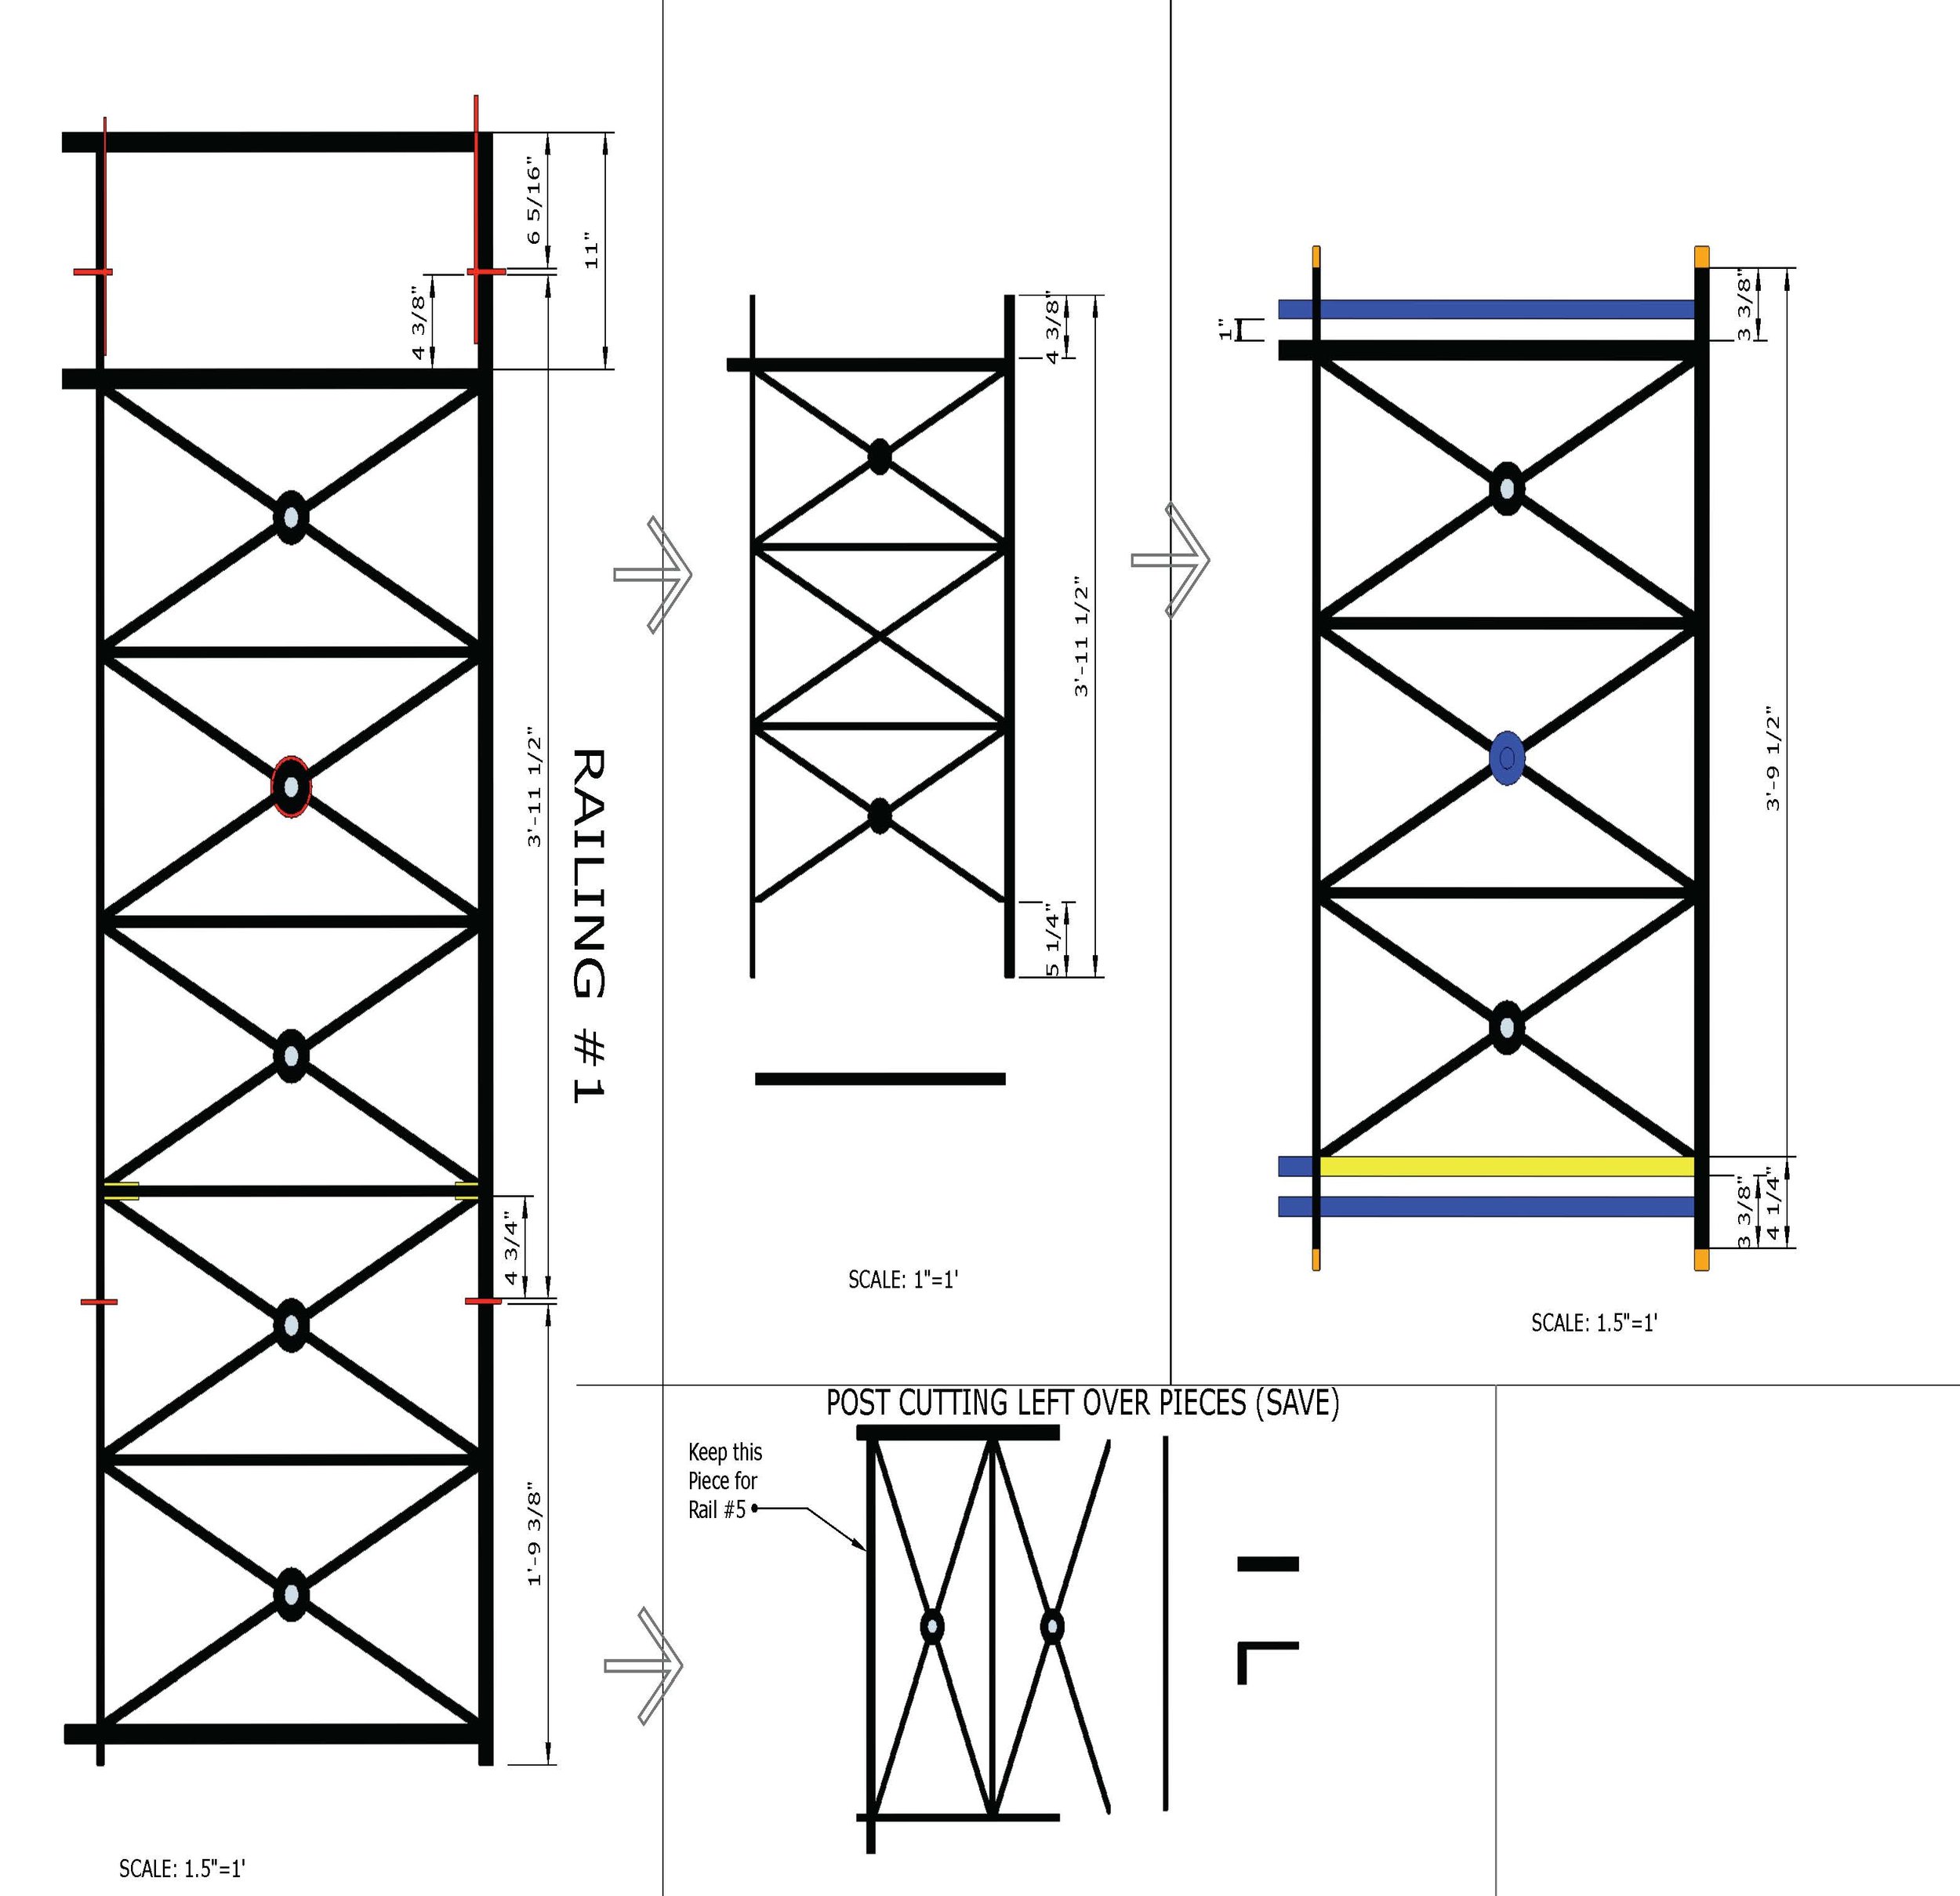
As you can see, the original design had three full rectangles in the smaller sections with its edges dying into the posts. Visually it looked fine, but it was not practical when it came to the cuts it would require to achieve the half ‘X’ into each post.
Taking those basics into account, I was now aware that the six small segments would fit three ‘X’ rectangles and the decorative flower portion would not be usable in the layout as the posts currently stand. Those parameters narrowed it down fairly quickly and was time to identify where each rail needed separated for our 3’-10” dimensions.
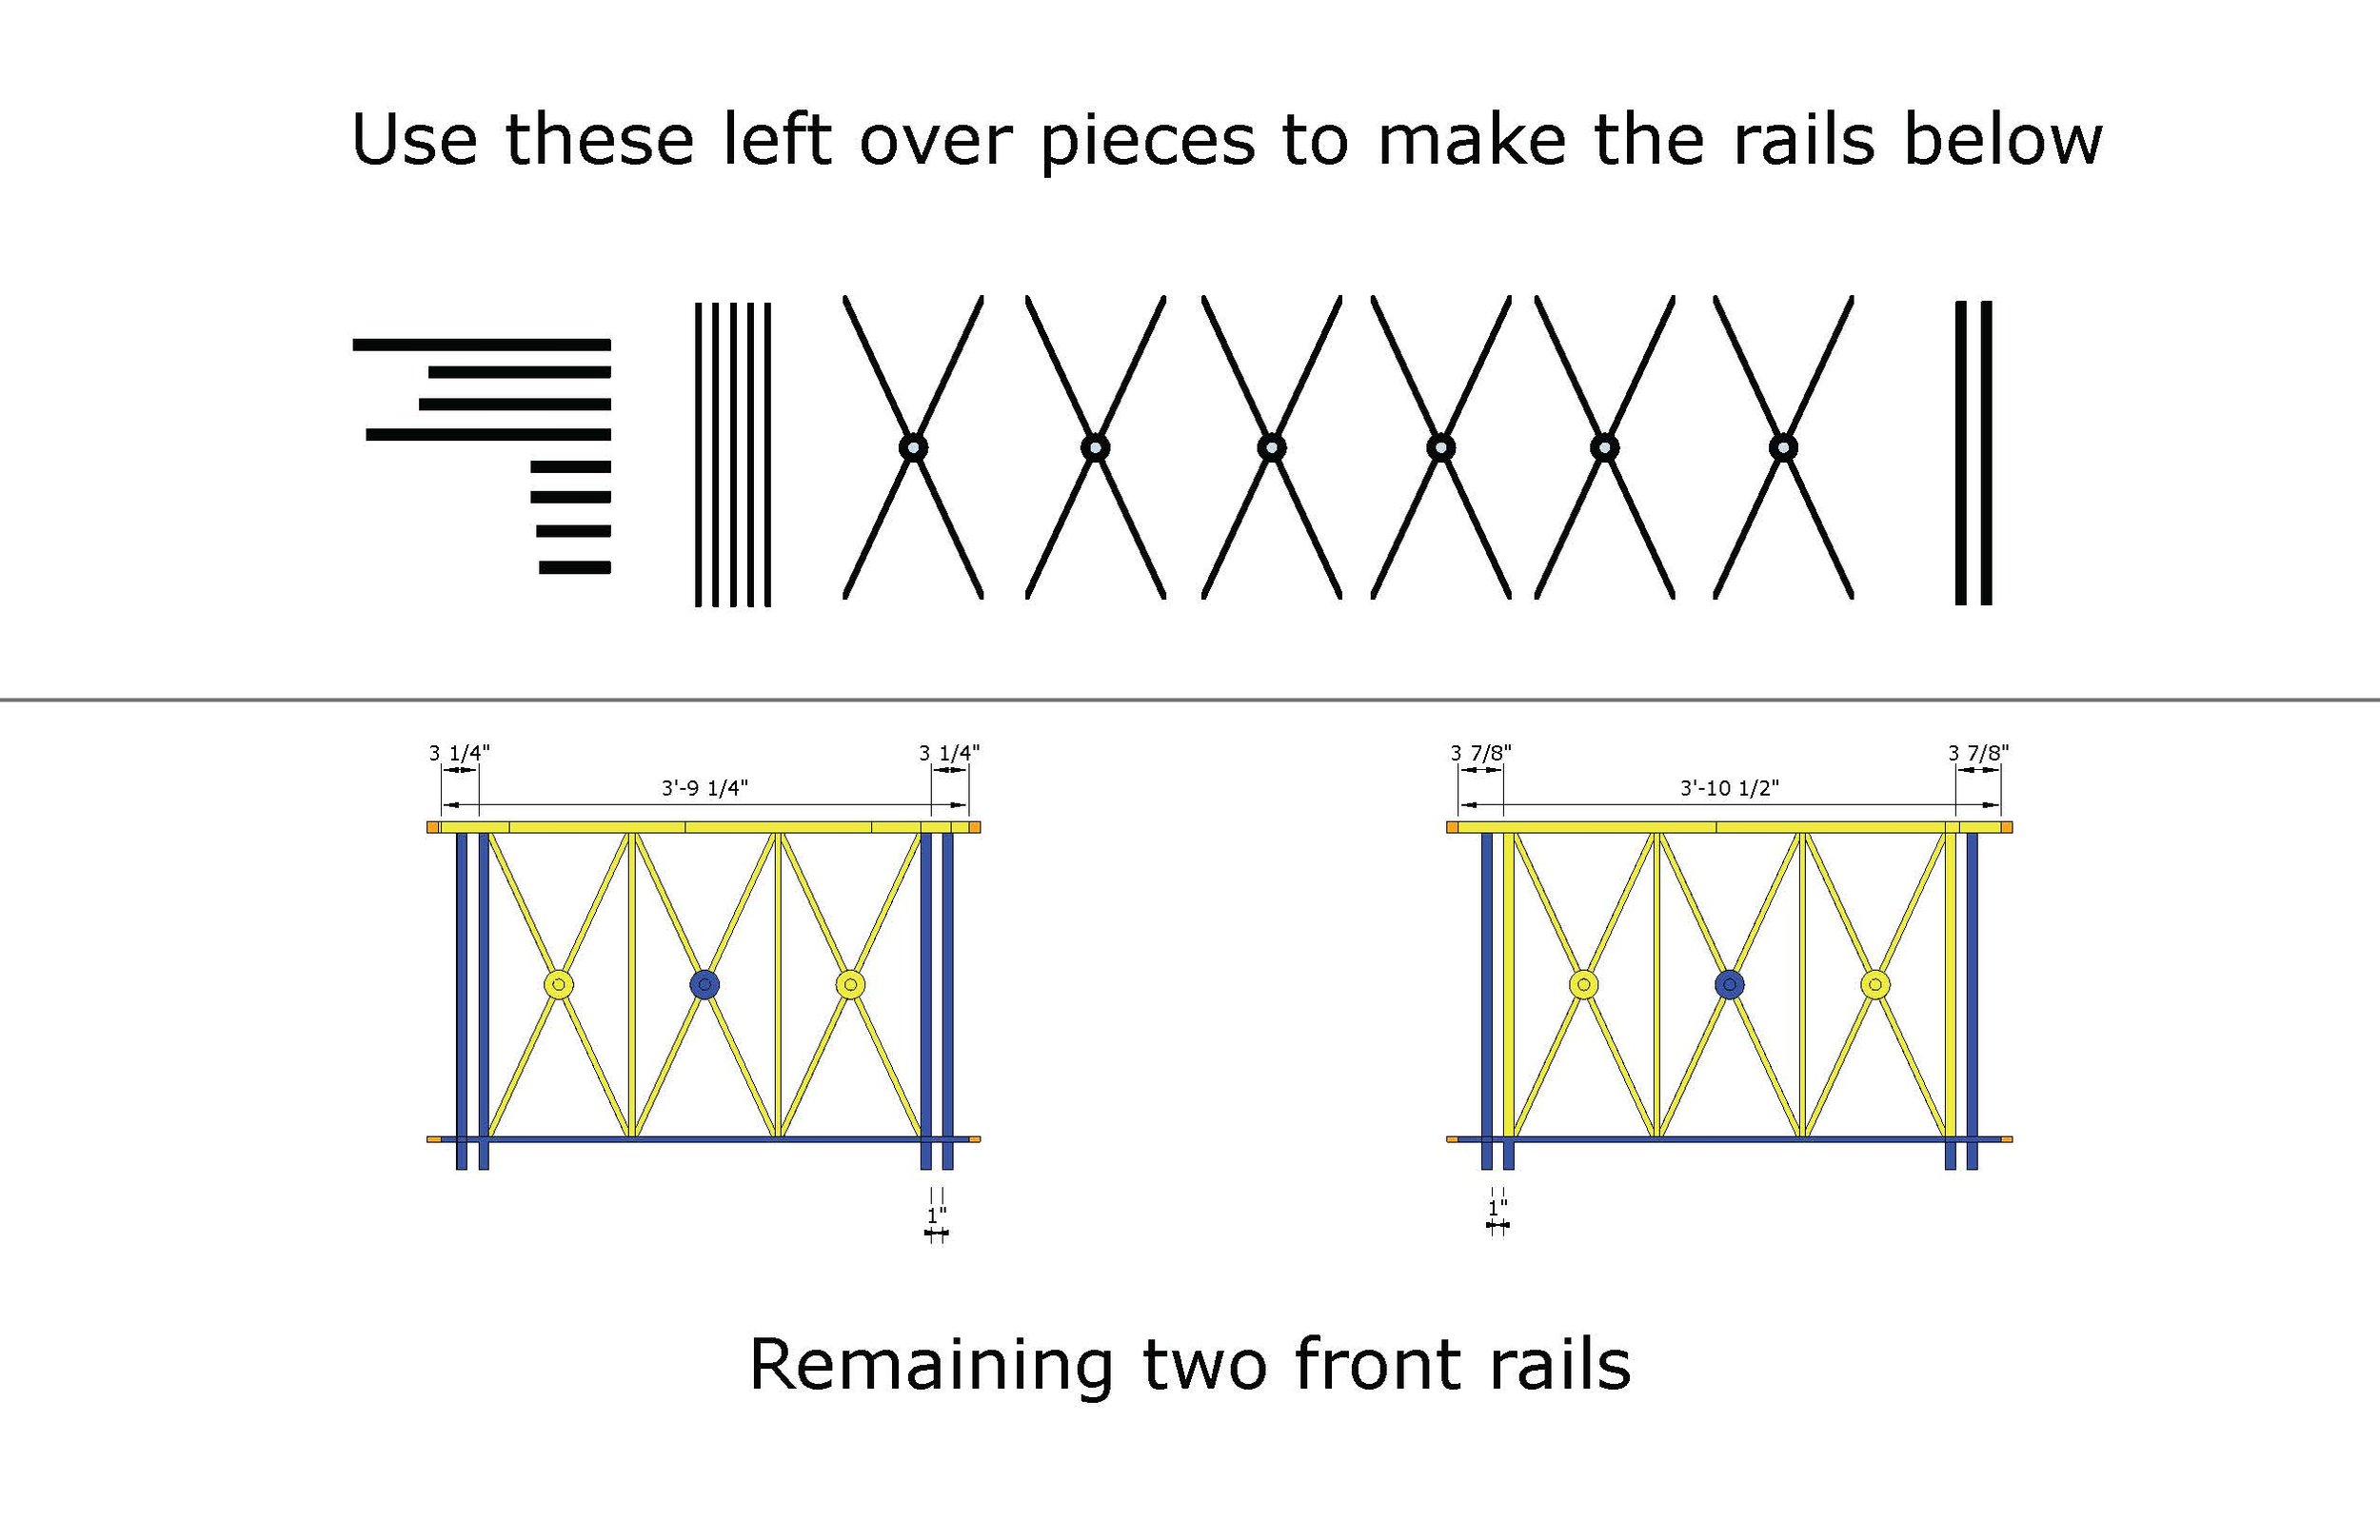
Five out of six of the pieces were the same basic length and design, which made it a little easier in figuring out where to cut and what would be leftover.
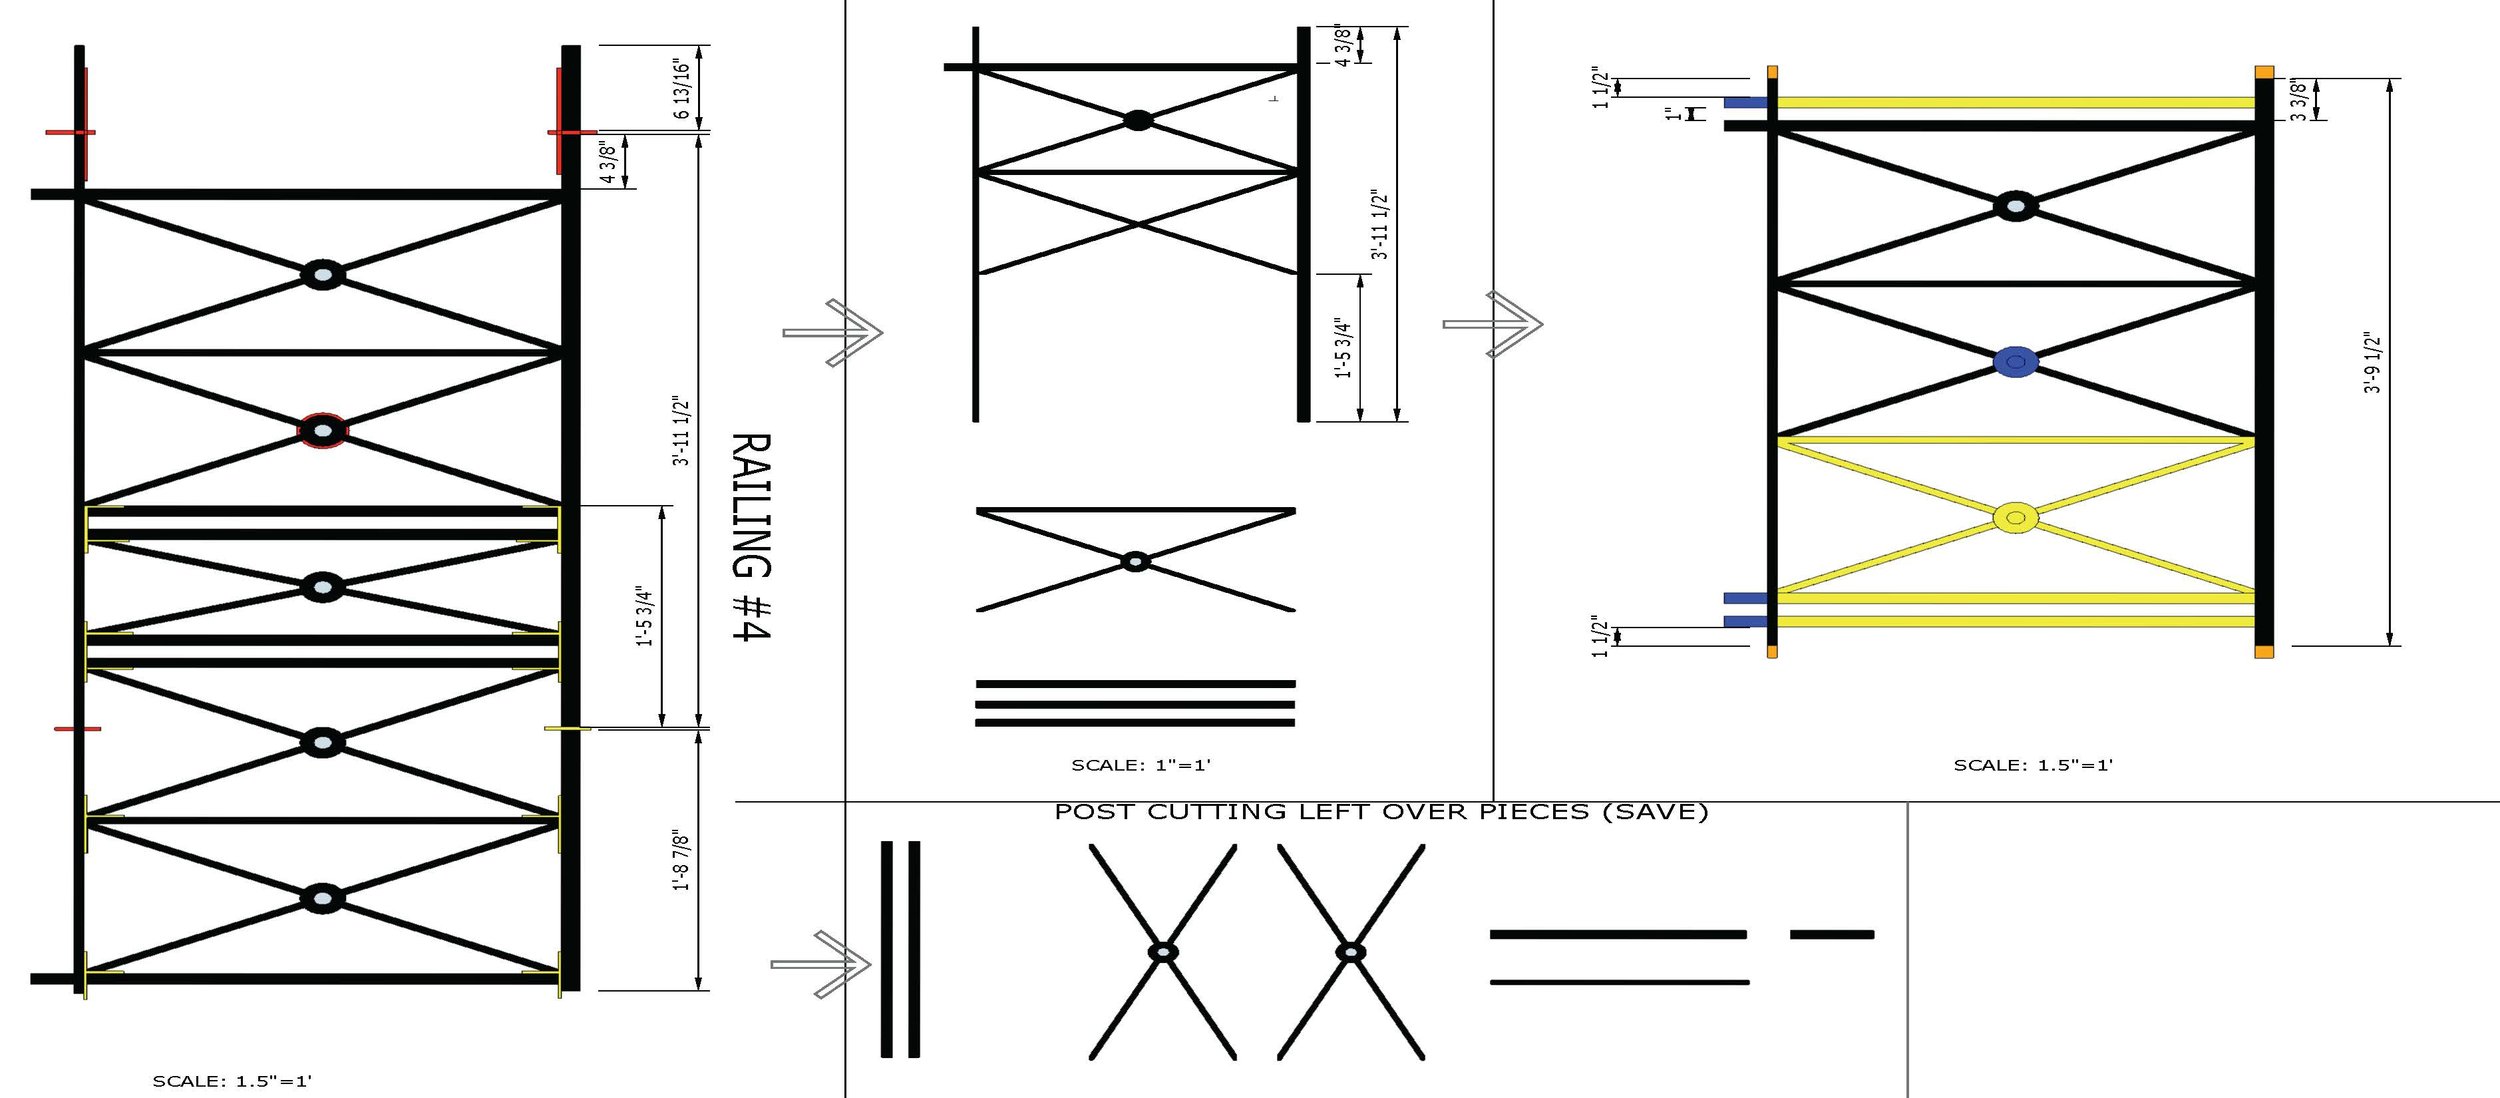
Due to having seven openings on the portico roof, at least one of the small sides would be almost entirely fabricated out of these leftover pieces. The remaining extras would be added to build up the larger eight-foot centerpiece.
Along with the leftover pieces, extra steel was ordered that would be necessary to replicate that portions our extra pieces wouldn’t cover. I needed some more flat steel that runs across the bottom horizontally as well as more 1” square steel that makes up the thicker outer vertical pieces on the ends.
Each rectangle was about one foot, so three of them added up to three feet and we needed to fit a 3’-10” gap. The 1” square steel would be replicated to look like each piece had two runs of the thick vertical steel as shown in the gallery below.
The gallery shows some photos of the original rail as well each page of the design indicating what is to be kept, what's to be added and what's to be purchased and inserted.


Now that the theory of all of this is done, it’s time to start cutting. Check back next week to see the next step in the process.
This blog topic will be broken into several posts to avoid confusion. Next week will feature the deconstruction of the rails as well as the process of rebuilding them.