Welding

Special Projects: Making a Decorative Railing Pt. 2

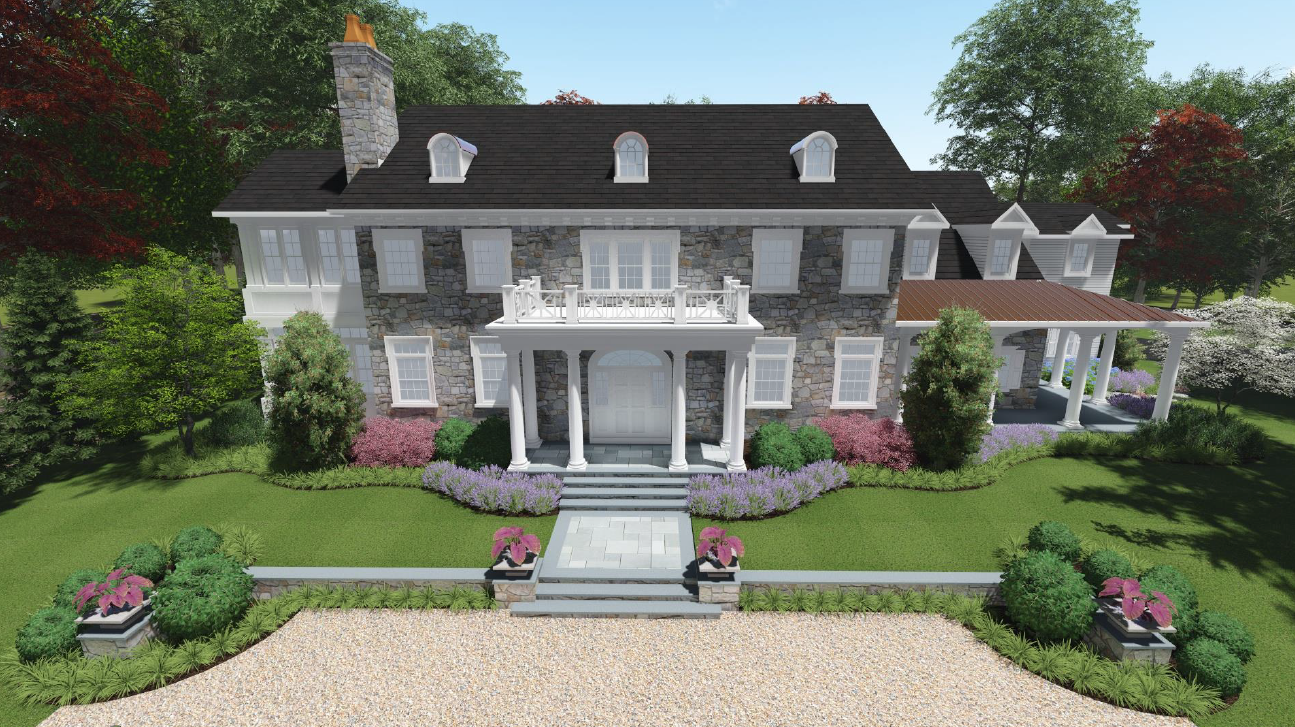
This is an ongoing series of blog posts that will showcase the design, construction and installation of a decorative steel veranda railing for our Benjamin Street project. To read the previous post in this series, click the link here or go to the main blog page.

So we have our design; we have all of our original and necessary new pieces; we have our equipment ready. Now it’s time to begin the deconstruction of the segments we are repurposing in coordination with our design plans.

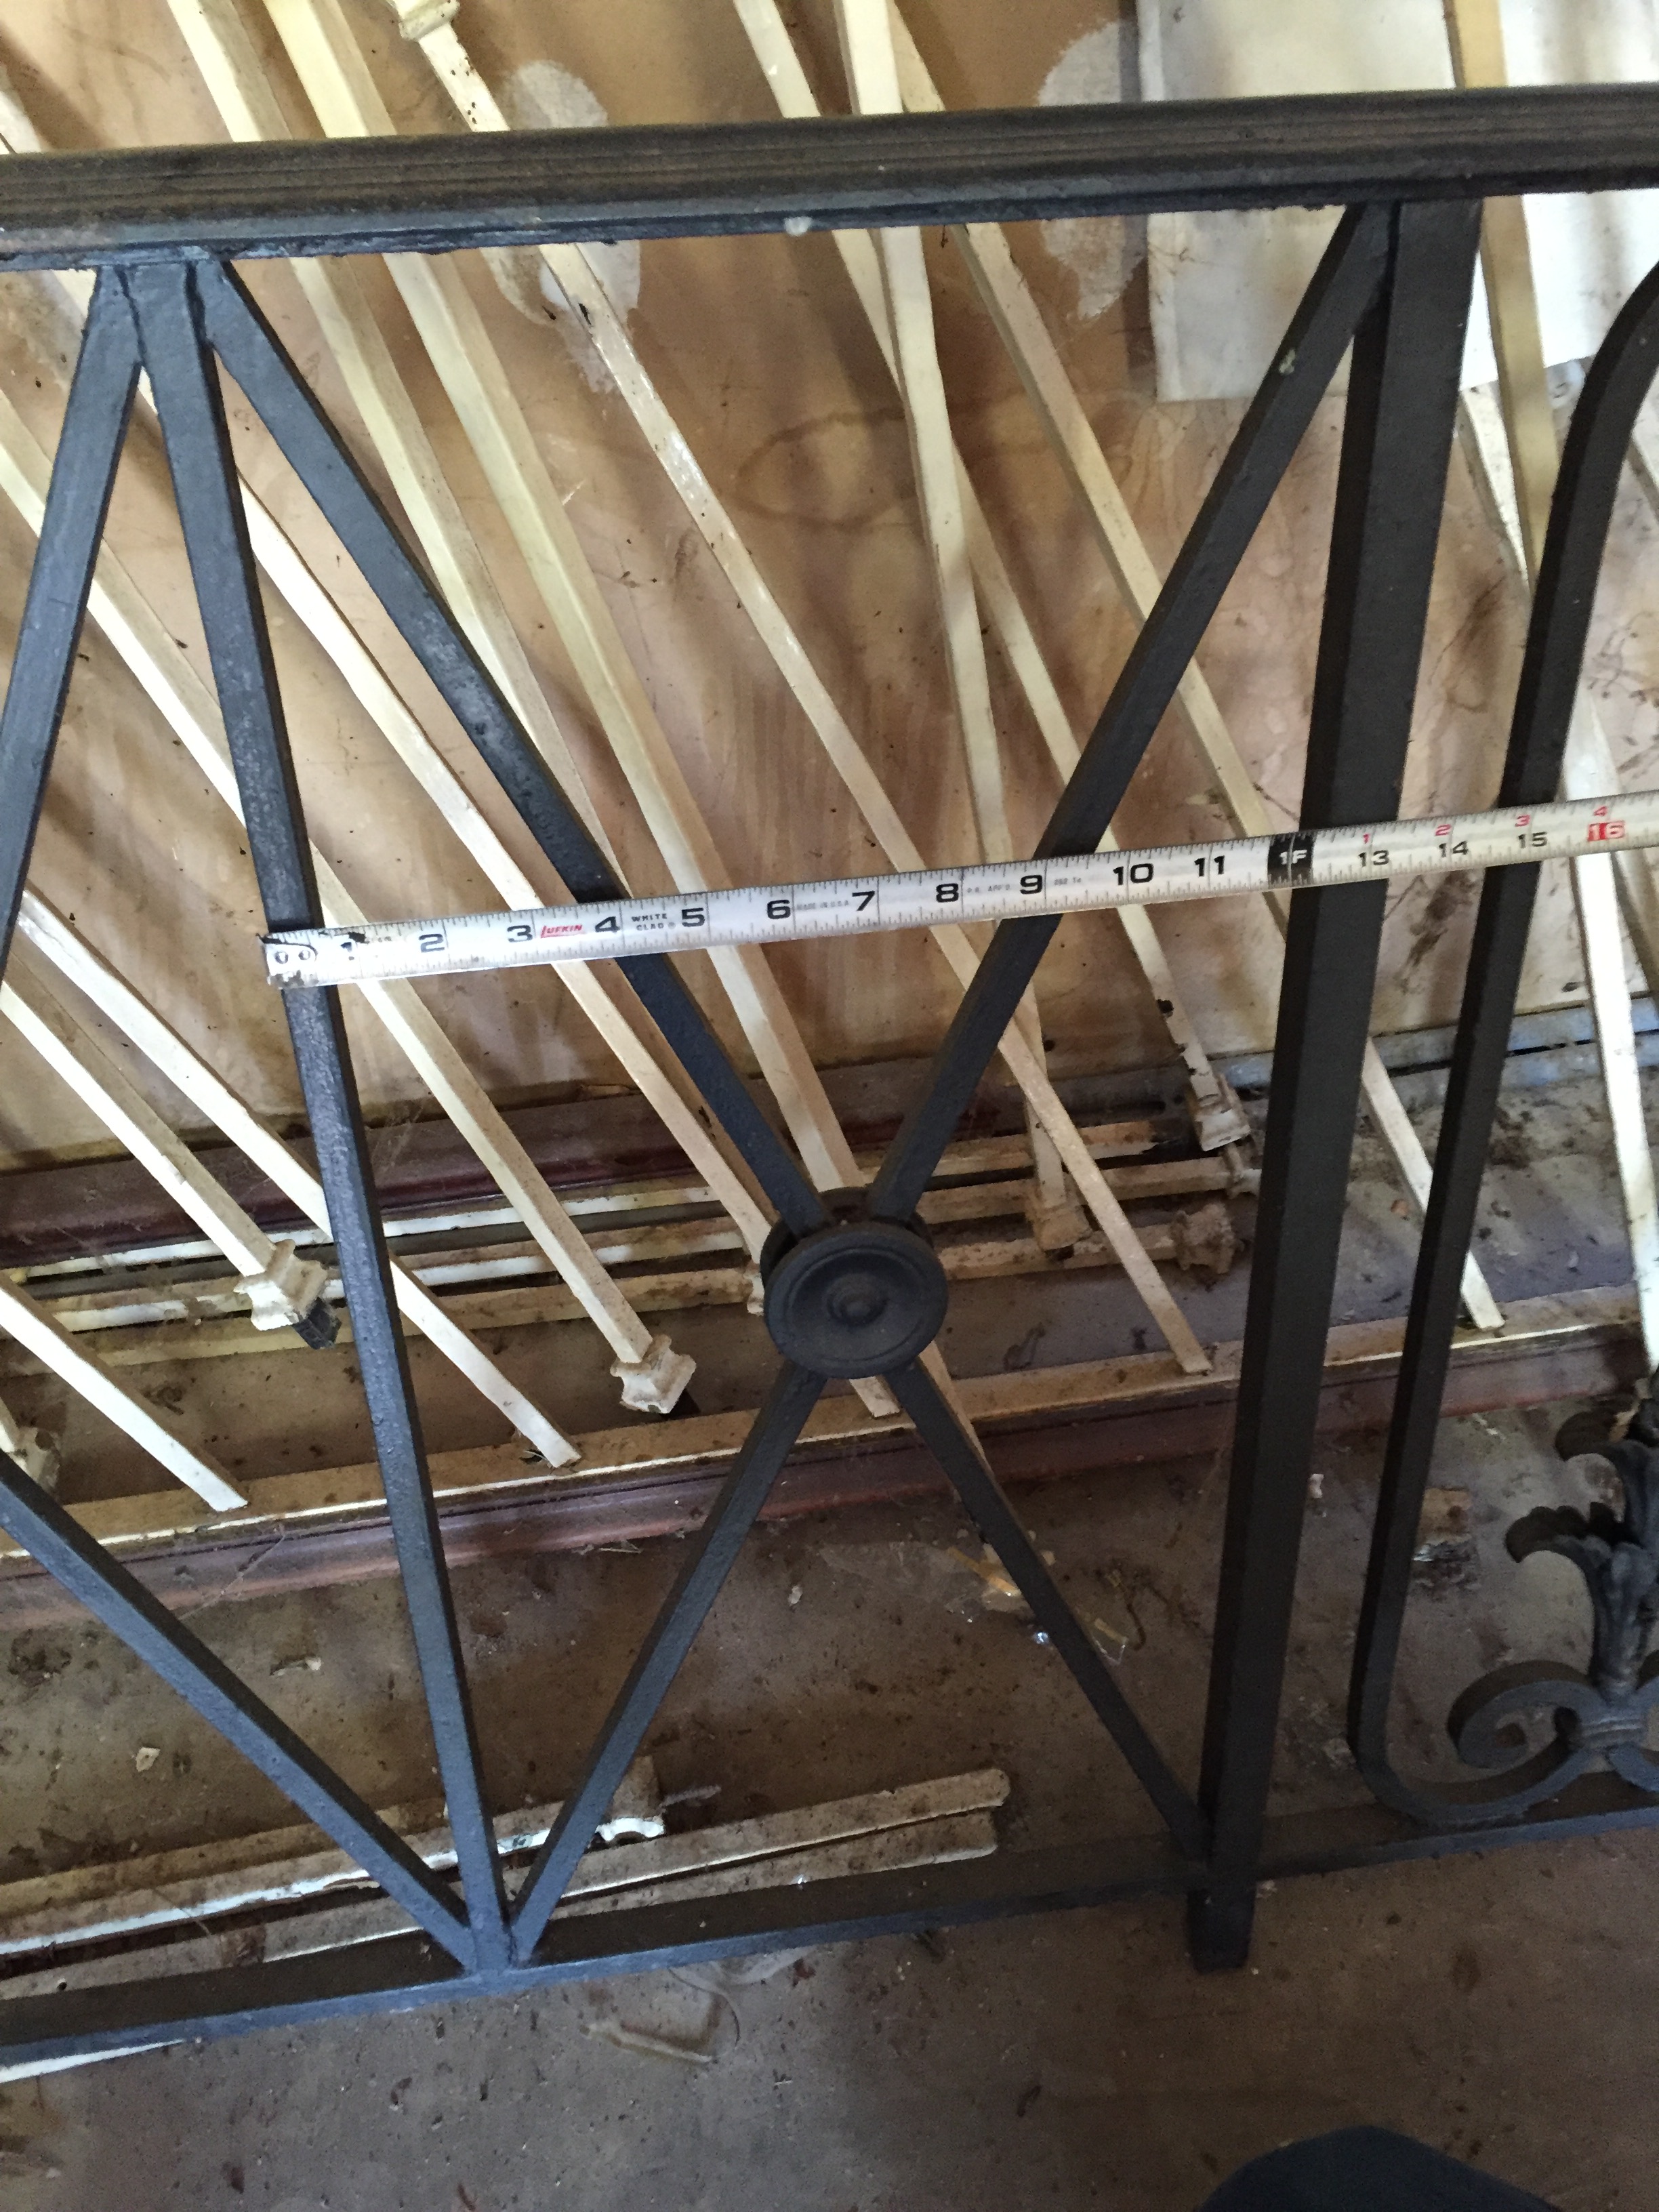
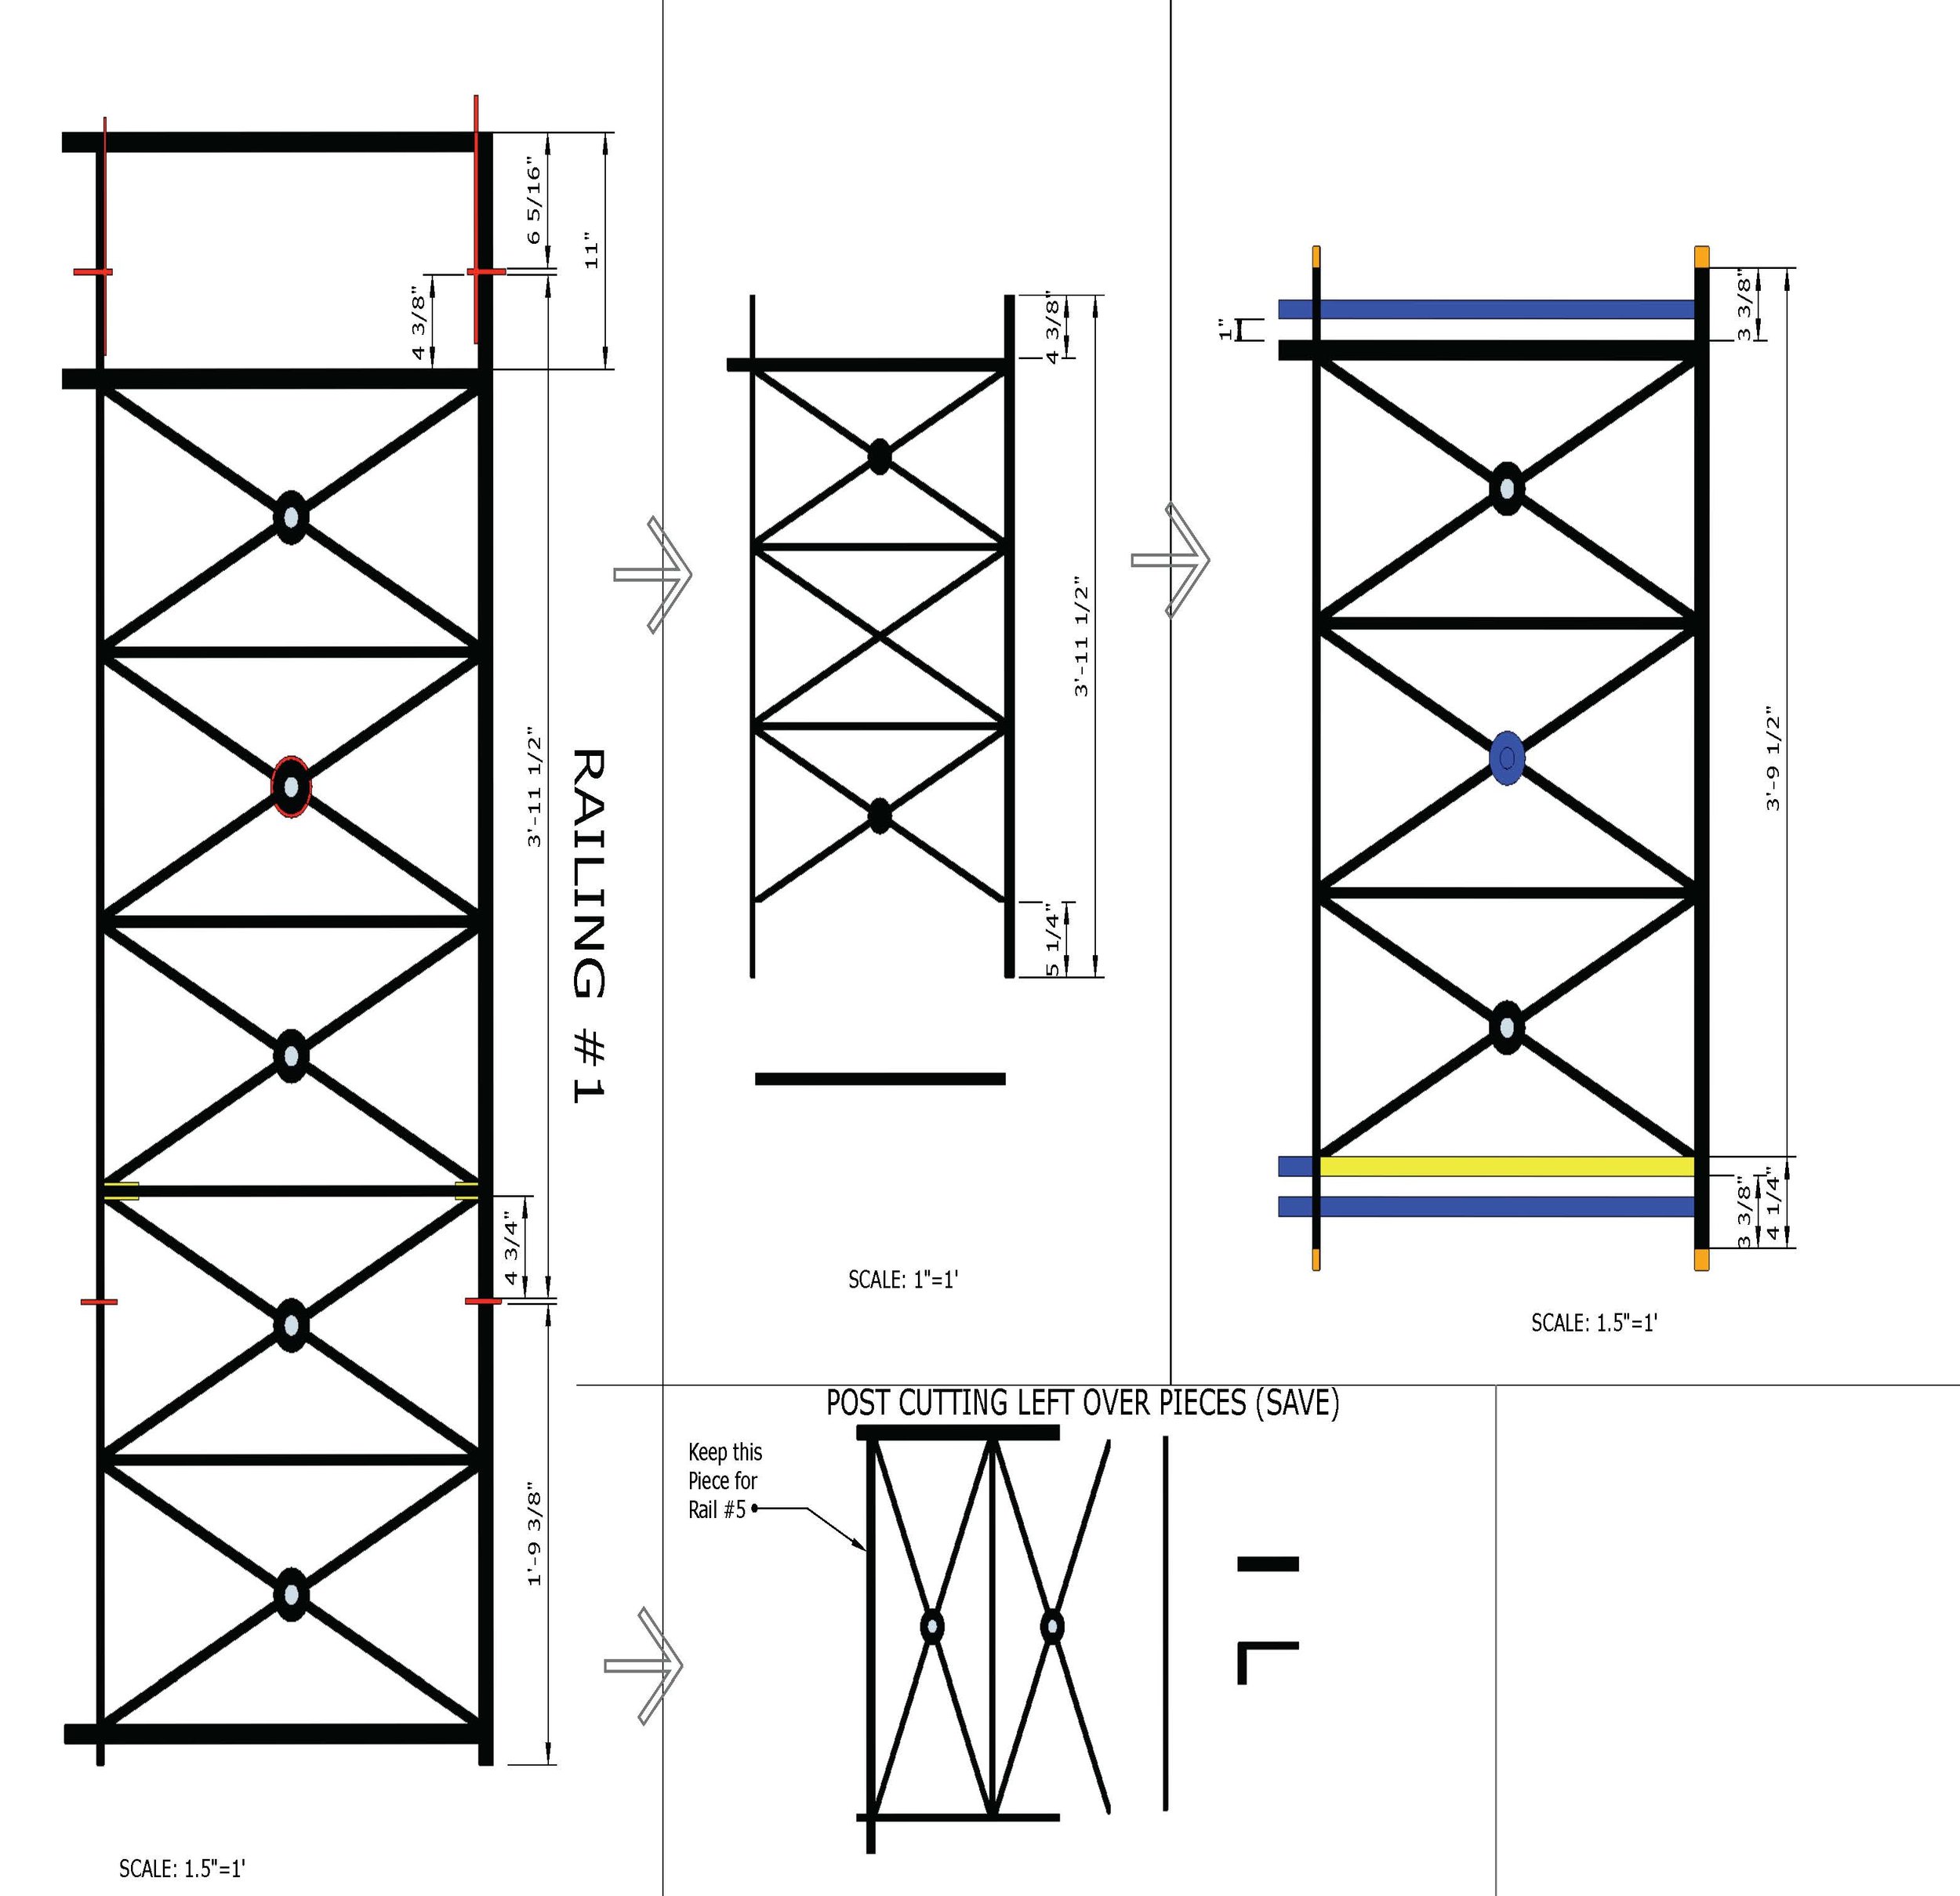
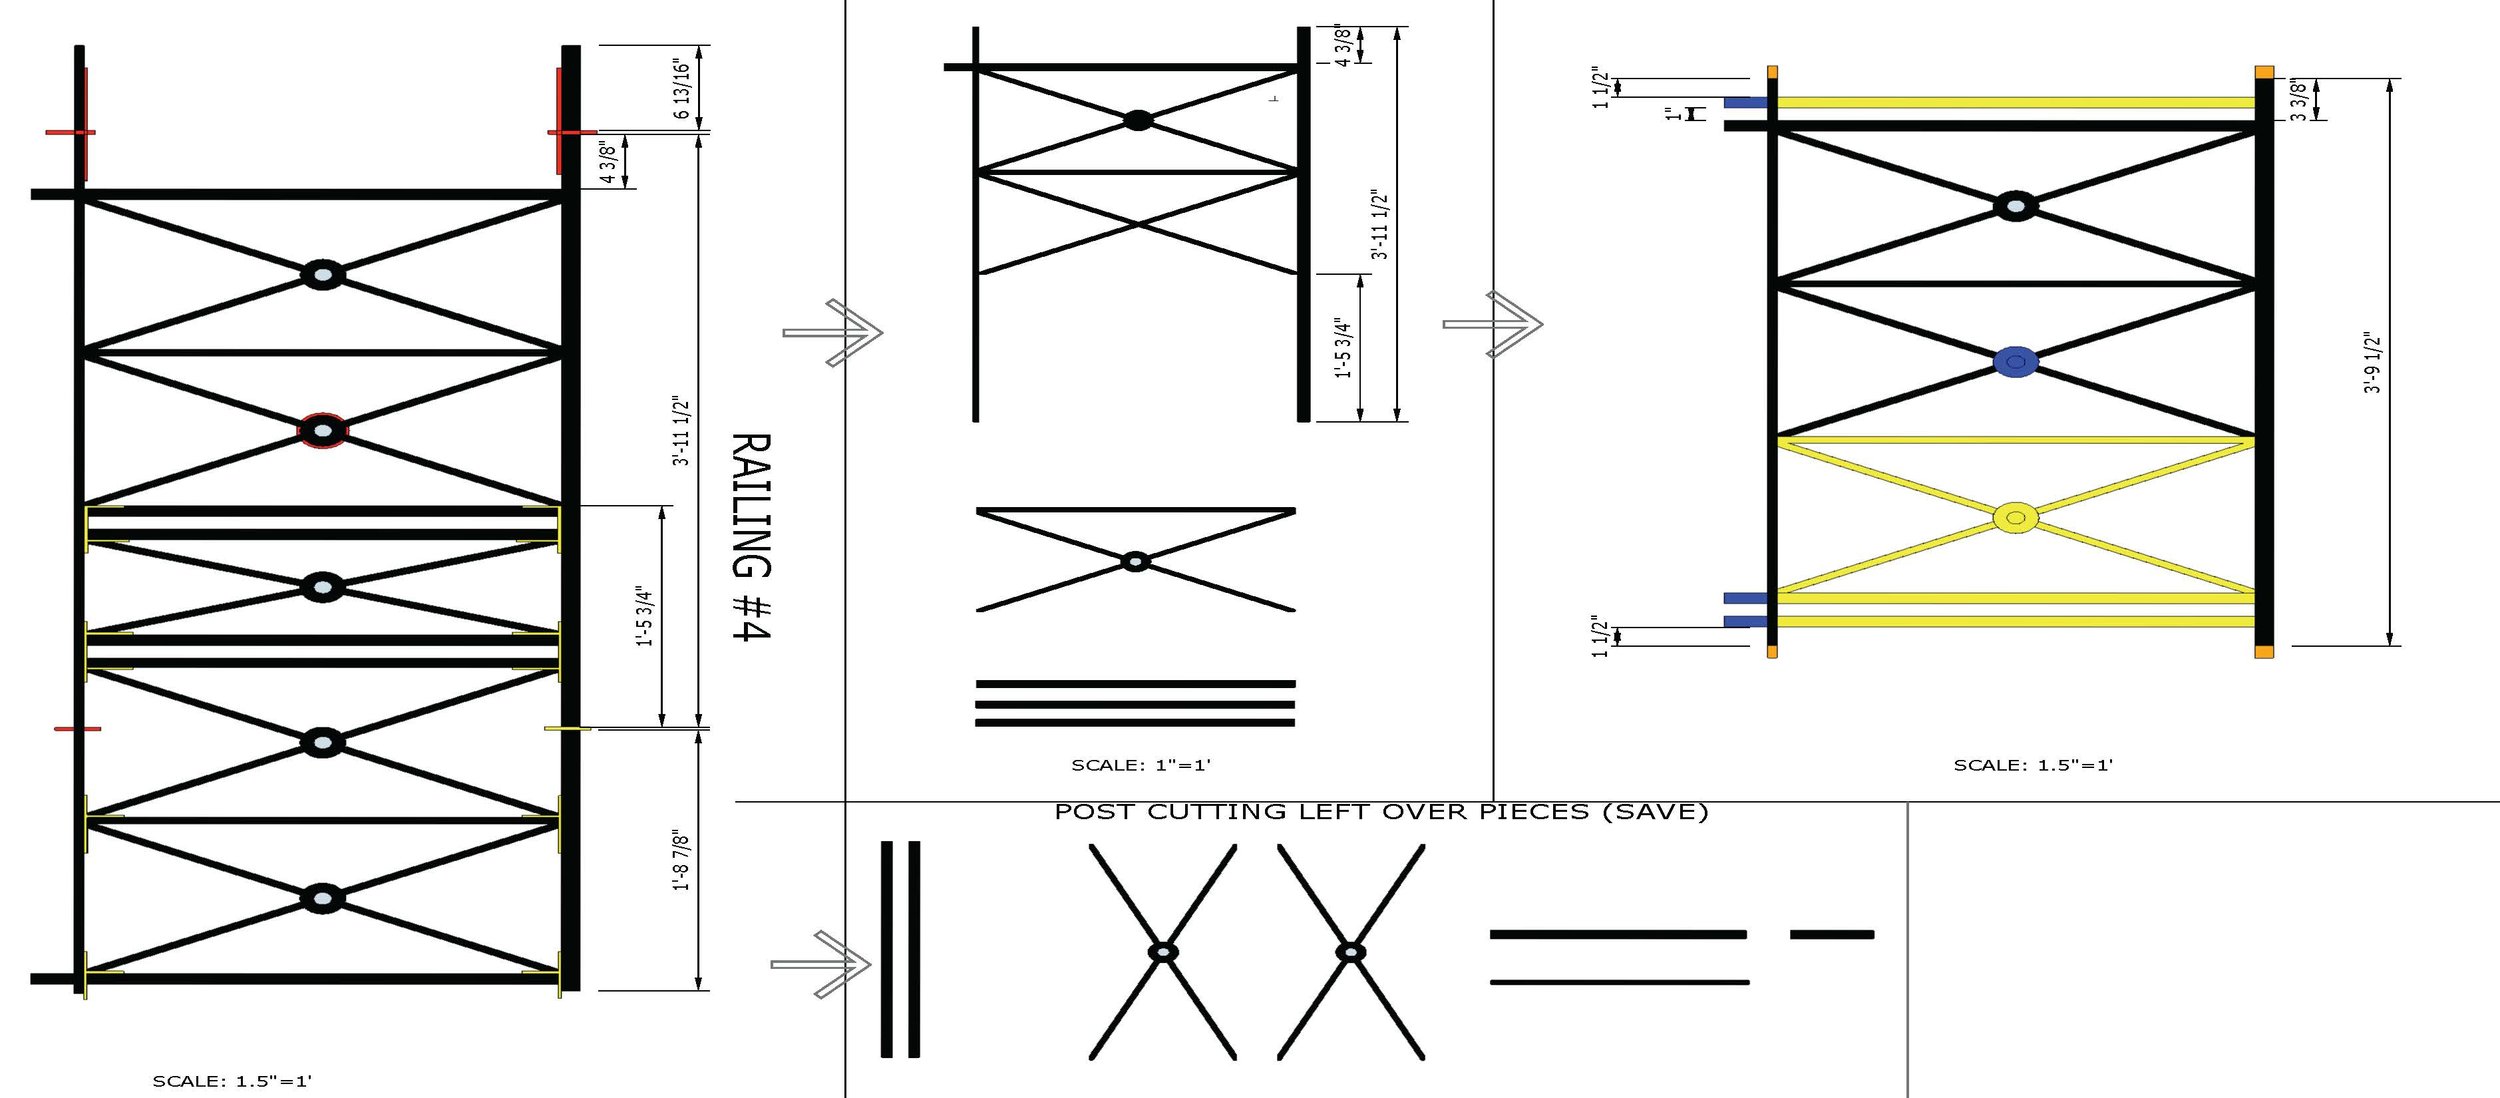
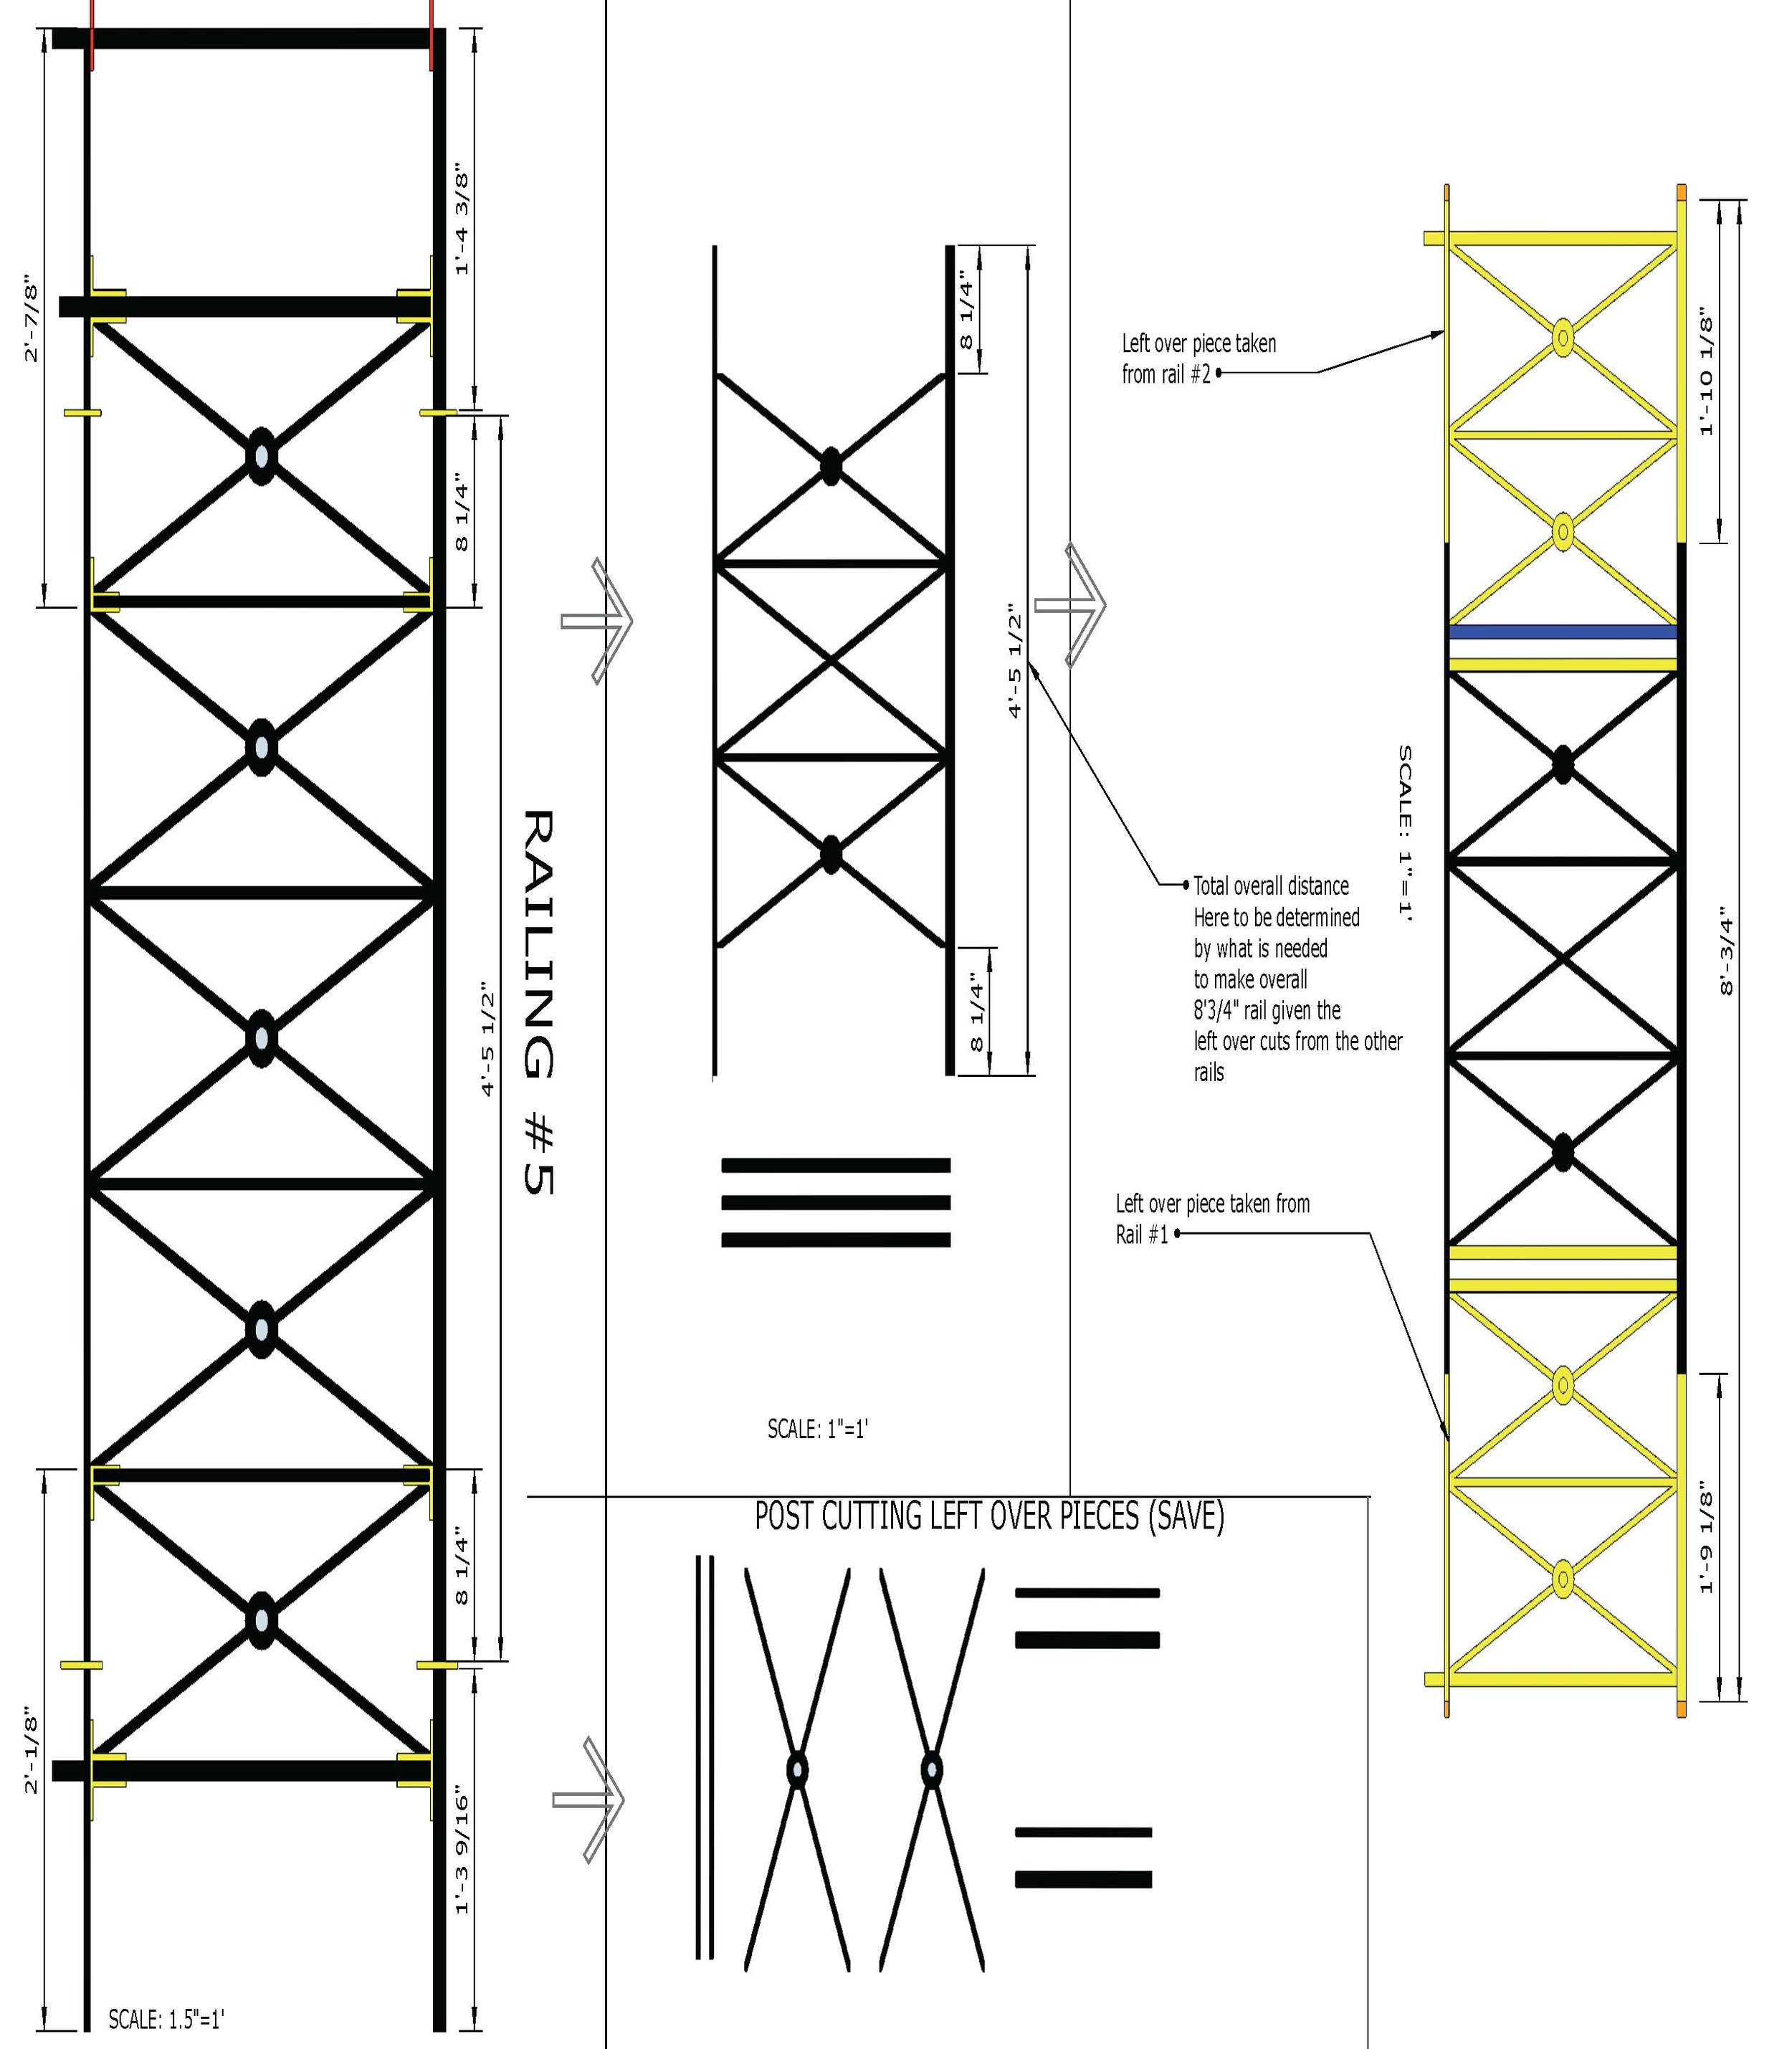
We showed you our intentions as to what pieces needed to be removed as we cut the rail into smaller sections and now it’s time to test the preliminary big segment cuts. For example, look at layout for ‘Railing #3’ and its different color-coded pieces.

Screen Shot 2017-05-15 at 11.18.36 AM.jpg

These indicate a variety of things: the red lines indicate the initial cuts needed on the existing pieces; the yellow color indicates that a specific piece removed from another section will be inserted in that given location and the blue color means an insertion of a new piece of steel that we ordered and had on hand to replicate the missing necessary features.

On Railing #3 we needed one 1” square vertical bar from another rail as well several pieces from our pile of new steel.  The new pieces needed were two 1” square vertical rails, three 1” square footer pieces and two decorative rosettes that we would weld on each side, replacing the previous rosettes that were no longer on the center-most rail section.

The new rosettes we found were from King Architectural Metals and fit our ideal size as well as a similar aesthetic to the old ones. It had an open hole in the center, which would allow us to weld it down properly, overtop of the previous center spoke from which we had removed the original rosette.

2016-08-26 12.21.35.jpg

Each rail segment followed the same procedures based on our design. Using a Sawzall reciprocating saw with a specific steel cutting blade, the dismantling began and segments became lighter and more in-line with the end product.

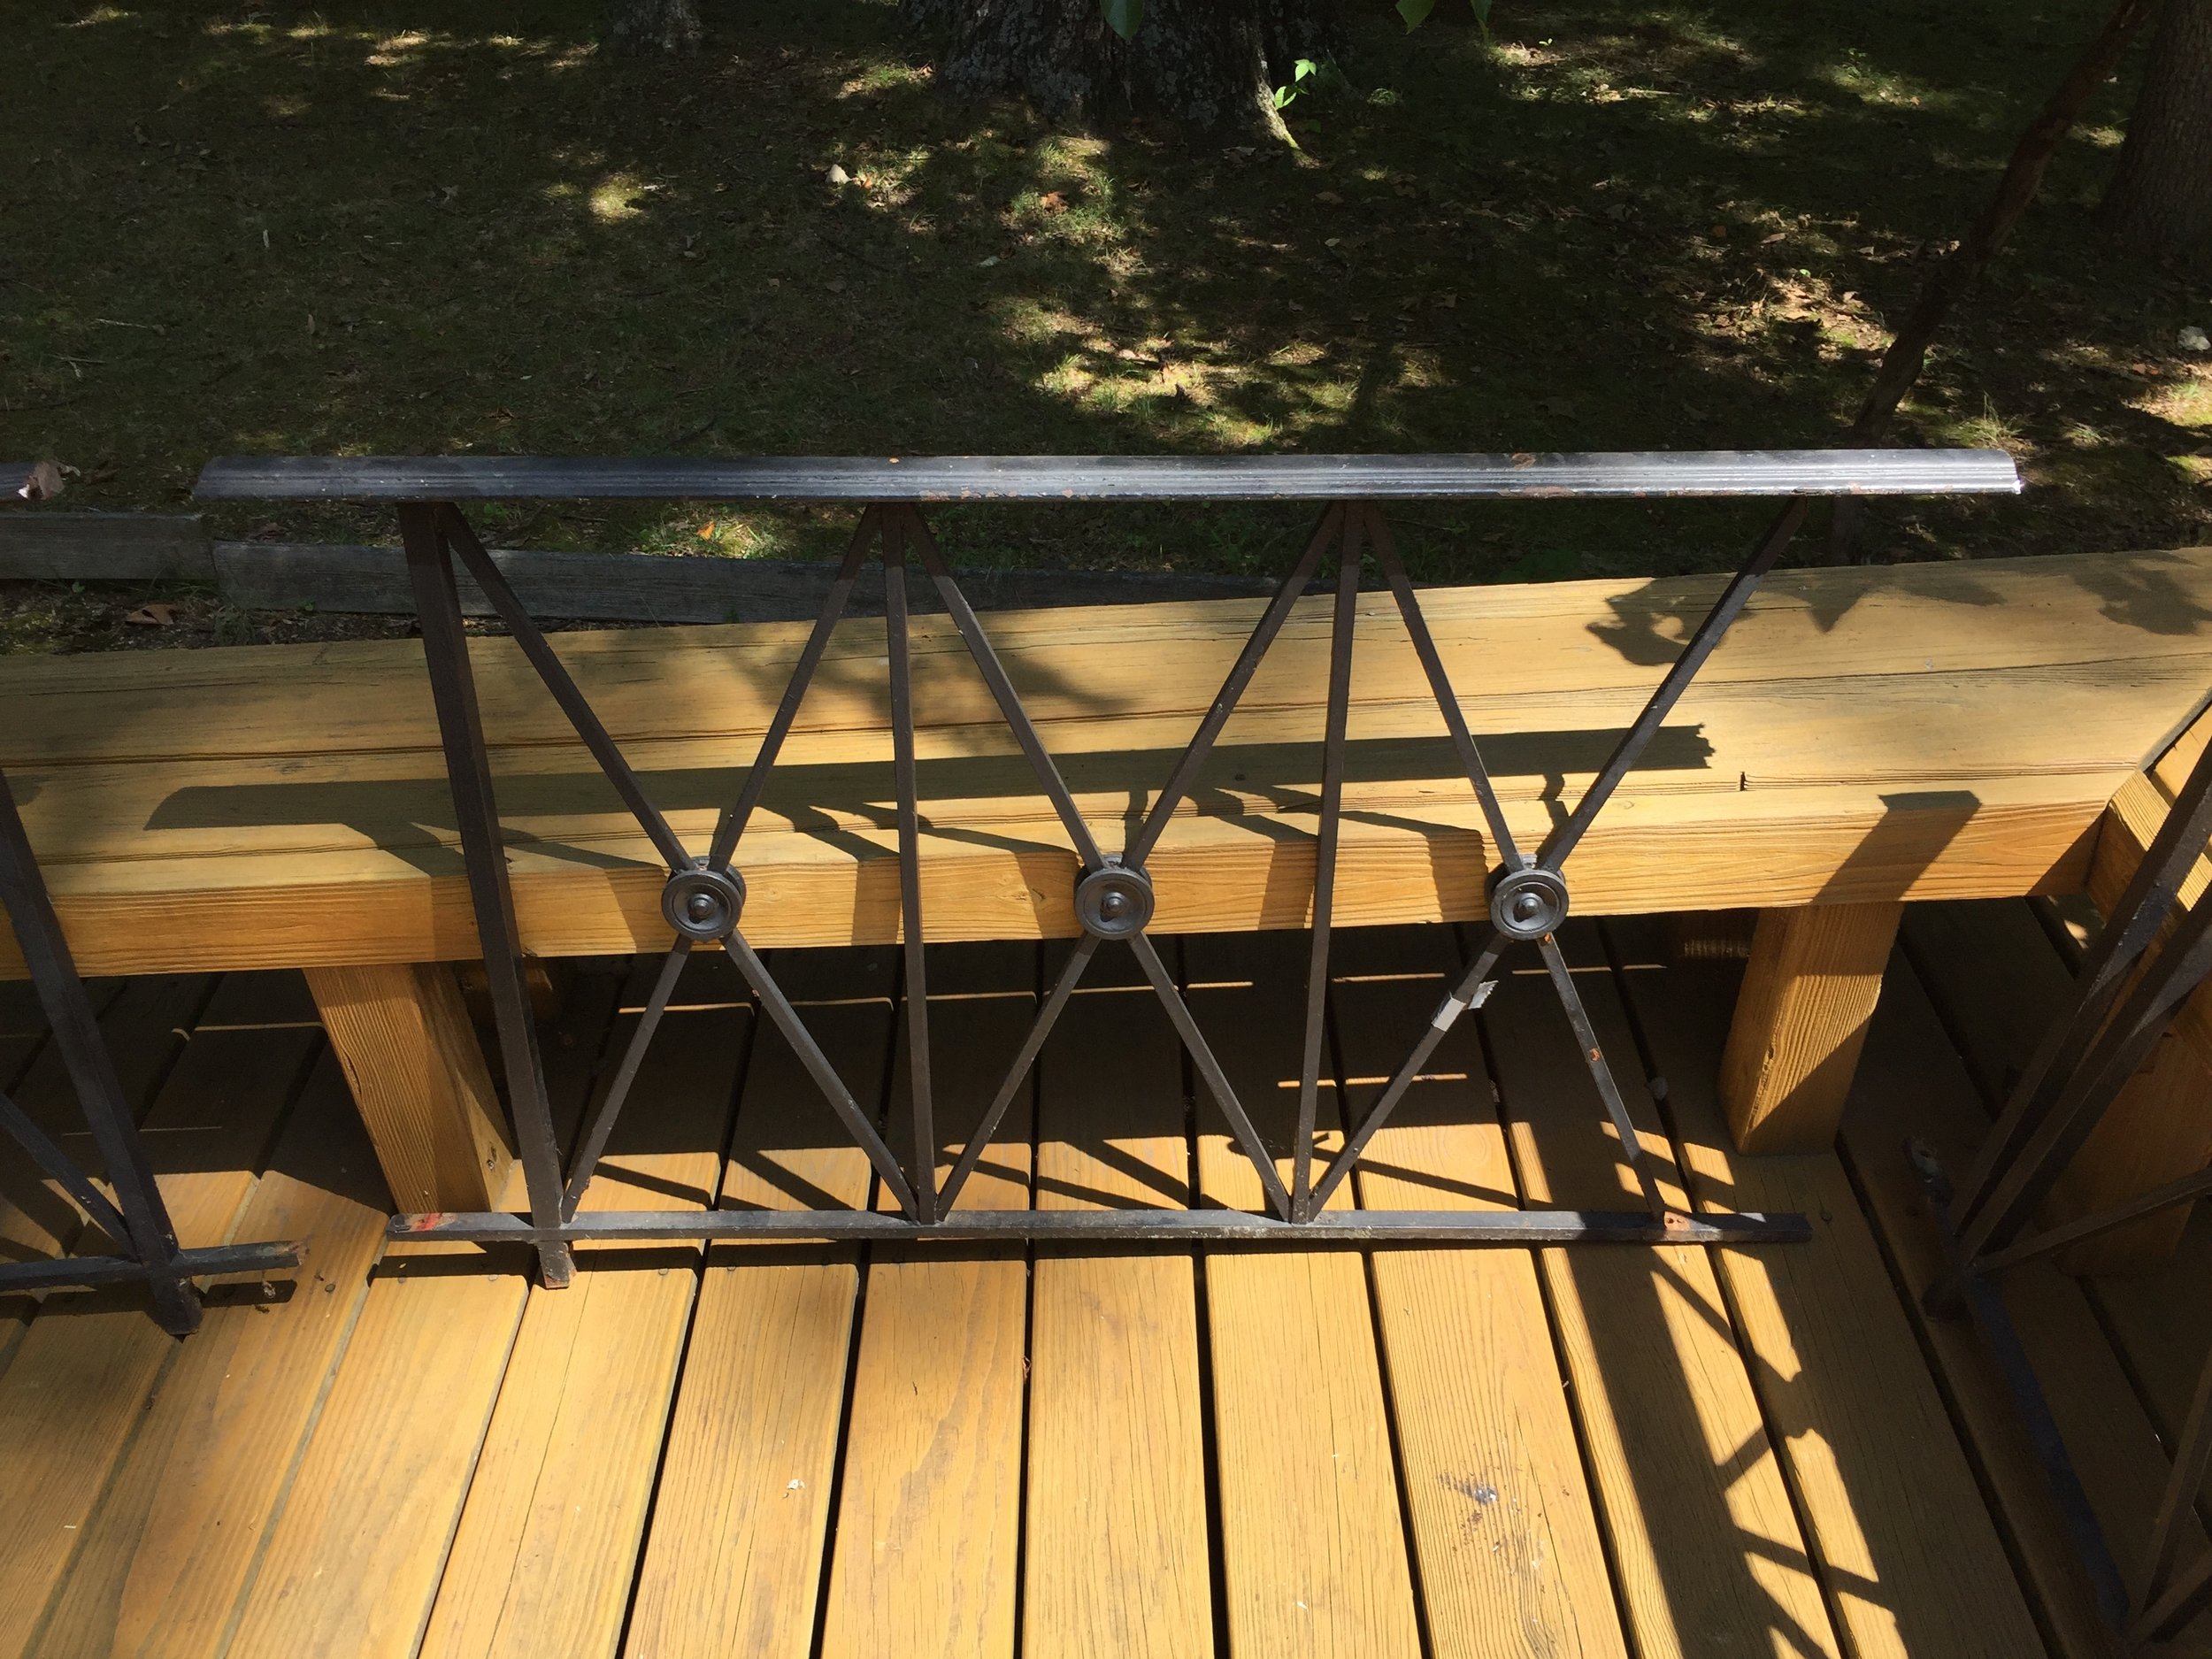
Once a given segment had been cut at the red cut points and the removed pieces were set aside, they were laid out on the back deck of our workshop. One by one, the segments were cut down and our pile of leftover parts grew. You can see the progress in the pictures that show the rails prior to any additions.

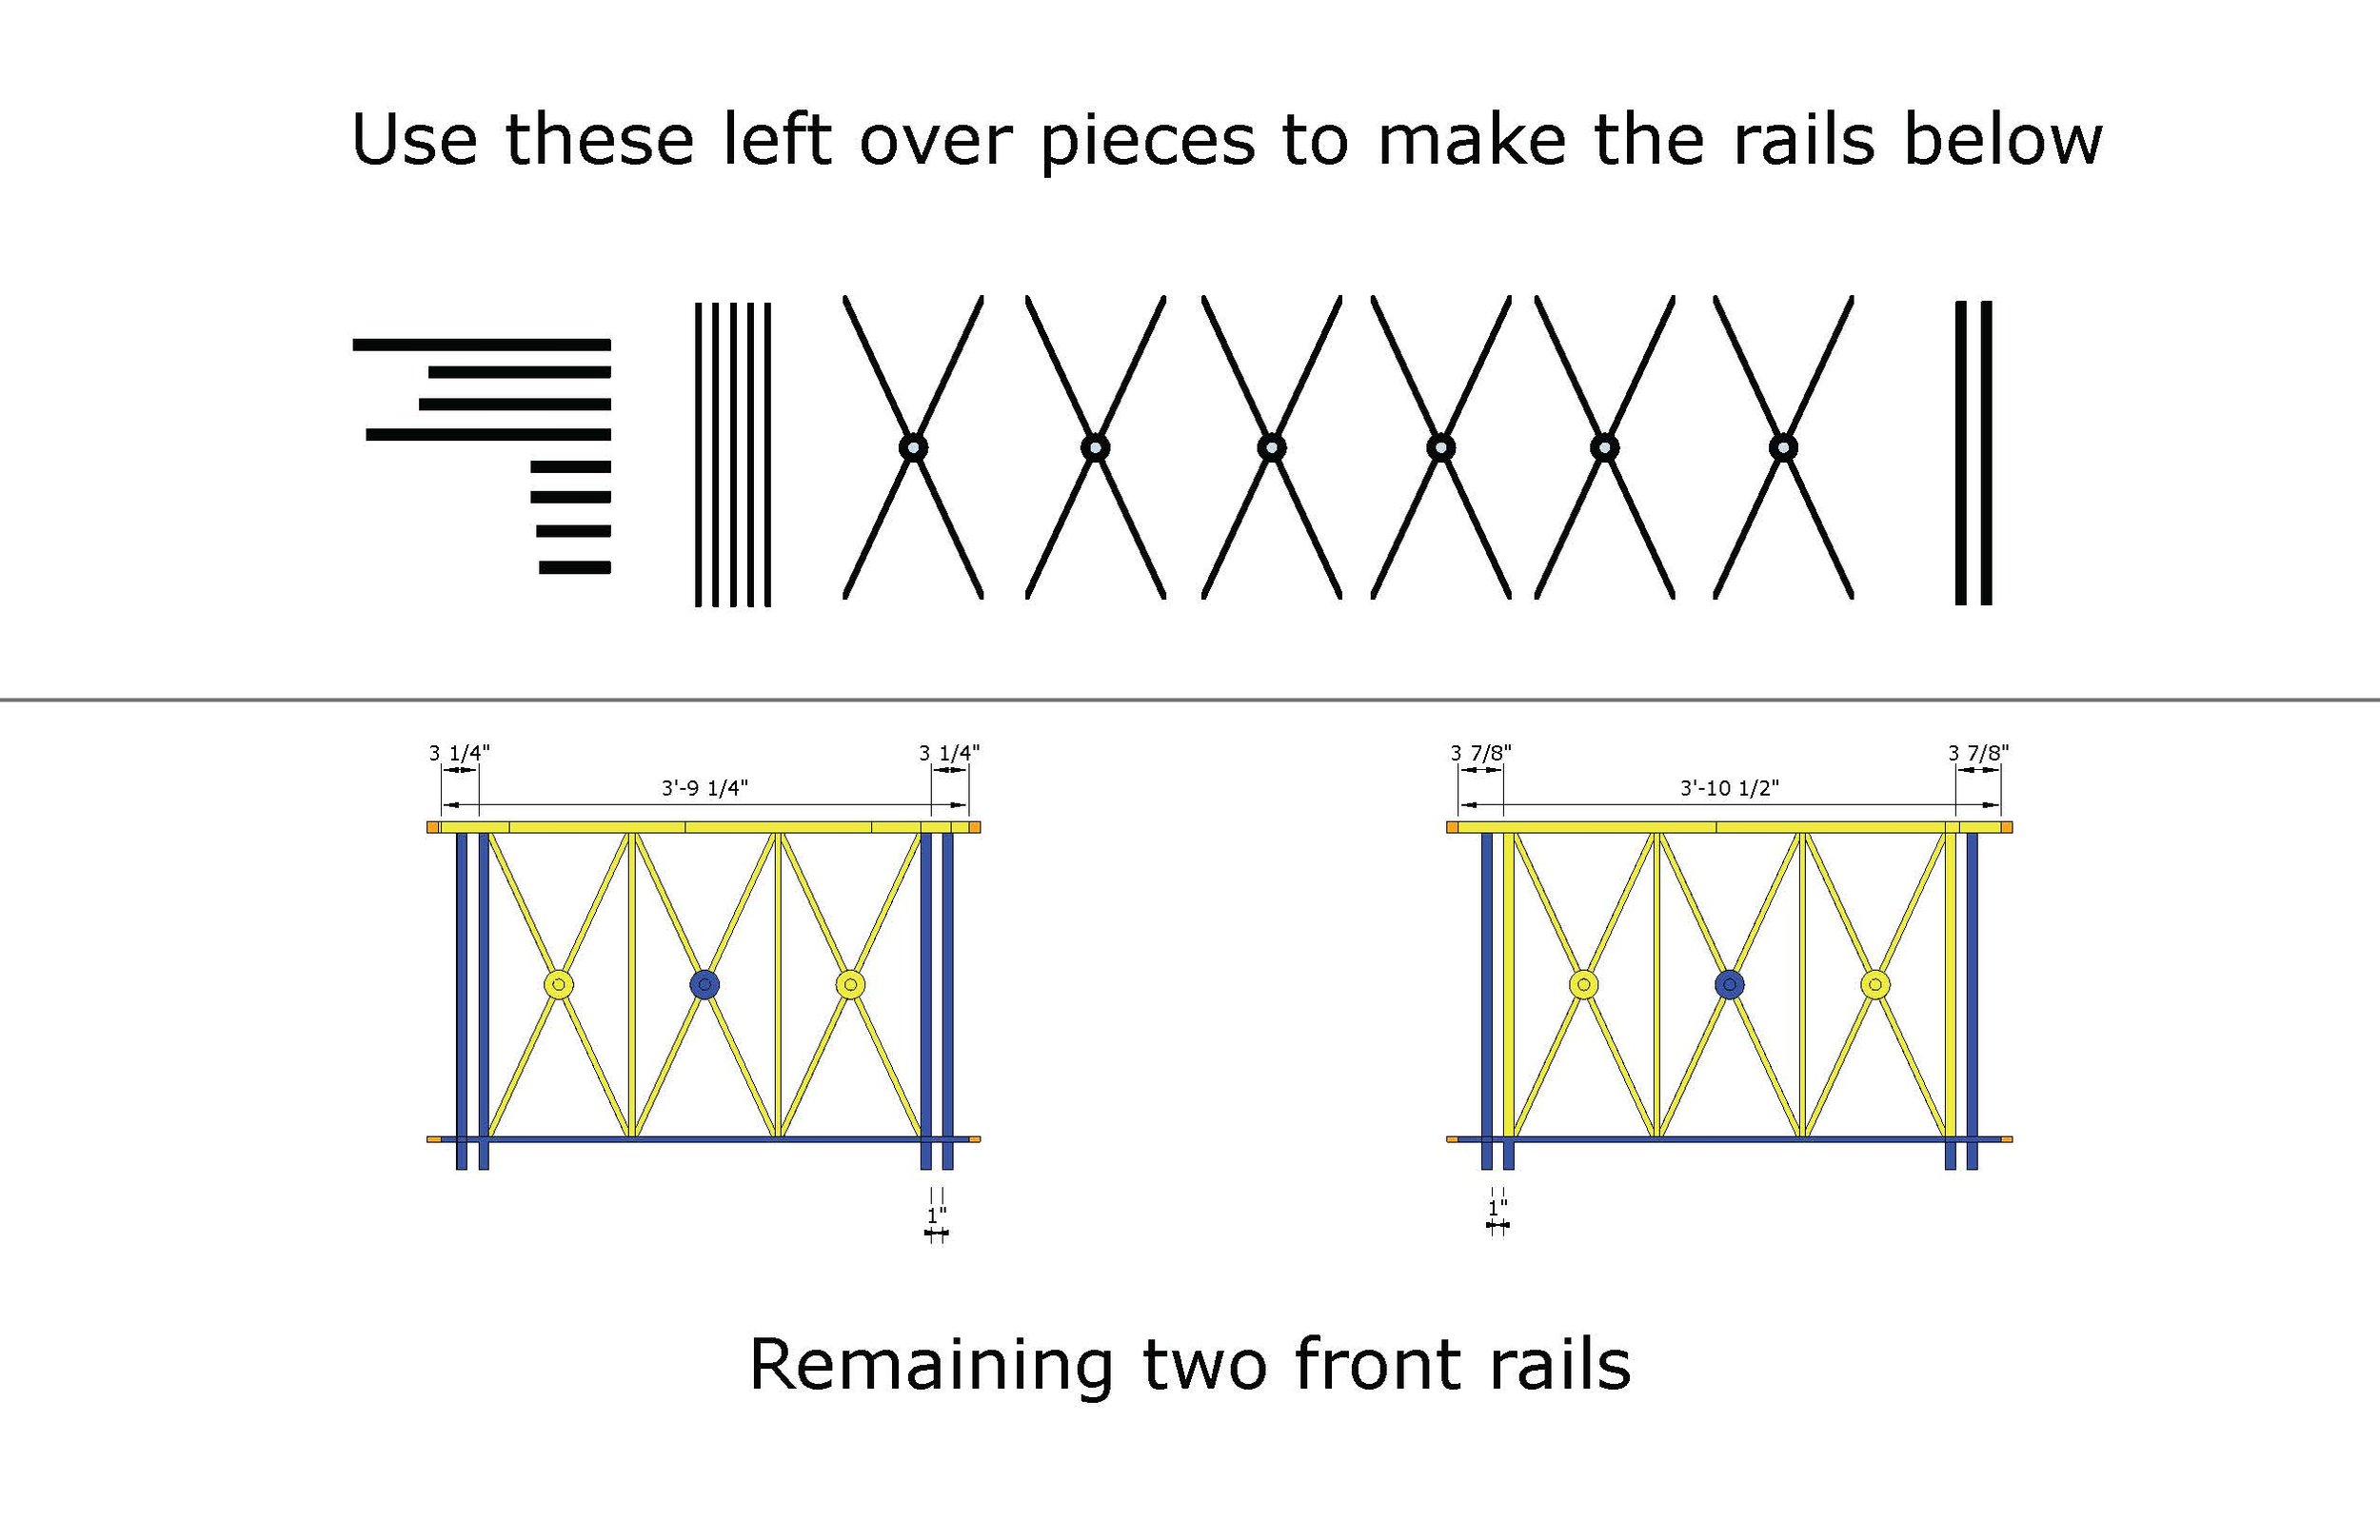
Each section was meticulously labeled to ensure that each section was true to size based on our original measurements we took from the veranda and the placement of the dividing posts. When all seven rail segments were completely cut down, it was time to divide up pieces from the extra pile.

The next step before welding the existing pieces down was to cut the remaining bars needed from our pile of new steel. We cut the steel based on our overall layout design, leaving a little extra on the ends since cutting the steel a little too long is better than cutting it too short.

Once we had all the necessary bars and rails cut to size, we started tack welding the pieces in place. Tack welding is the process of using small weld points to keep something in the proper location and alignment before final welding can be completed to truly lock the steel in place.

Once a segment had all of its pieces in place, I went around all the seams and gave it a solid final weld. 

After the segment had cooled down from the welding, each one had to be grinded and smoothed down using an electric hand grinder with a special metal cutting disc to remove any steel splatter and rough welds.

The final items to be welded were the aforementioned decorative rosettes. They are made of a very thin bit of steel, making them very delicate to weld down without melting them, which is why I saved them for last.

Now that all of the welding on a given section was complete, it was time to give them a few coats of black Rustoleum exterior paint to lock the steel away from moisture and possible future rusting. This entire process was done for each segment: cutting, dividing, adding, welding and painting.

All seven segments followed this process in a lengthy and somewhat aggravating process. By the time the segments were completed, I had earned several minor scars from burns and an achy back from moving these heavy steel rails.

While the whole progression of the rails was tedious, seeing each of the final products leaned against the wall ready for installation was extremely gratifying.

Check back for the final post in this series to see how the rails turned out once we began the installation process on the porch veranda roof.

Special Projects: Making a Decorative Railing Pt. 1

An early rendering of the Benjamin Street home with a white railing above the front door porch.

An early rendering of the Benjamin Street home with a white railing above the front door porch.

If you glance back at some of the Special Project blog posts, you’ll see several welding projects BlackRock has done in the past. I shared our earlier projects of rebuilding a landscaping trailer and a kitchen island, even using our homemade welding table on the latter project that was also presented in previous posts.

Now that I had some experience welding a variety of projects, I was given a new assignment that would require me to repurpose six pieces of a steel railing and turn it into smaller segments of decorative railing that would border the roof of the portico at our home on Benjamin Street.

For those unfamiliar with the term ‘portico’ like me, Dictionary.com defines it as “a structure consisting of a roof supported by columns or piers, usually attached to a building as a porch.”

Since the portico has no upstairs walkout access to serve as a real balcony, the aesthetics of the rail were the key factor rather than a functional hand railing. The portico extends above the front porch and is directly in front of the master bathroom, overlooking the front yard and driveway of the property.

Before I could get started, I had to go out to the property to get proper measurements of where each post was located on the roof so I could identify the length of each rail segment needed.  All six of the smaller segments were almost exactly evenly spaced around 3’-10” with a larger centerpiece that measured out a little larger than 8 feet.

The posts are one foot squares that setback around 1’-1” to provide a lip around the portico roof. Take a look at the floor plan layout that shows the placement to get a better visual understanding.

After getting all of the dimensions necessary, it was time to take the existing rails and get precise lengths of each portion to identify the best points to cut the rail that wouldn’t waste other pieces. After getting the numbers, I drew them in Google Sketchup exactly to scale and began to experiment separating the rails at various points to figure out what would work best.

While this process was a bit tedious, there were only so many choices to ensure that every rail matched. I took my layout that I created and inserted very basic 2D railings to show what was required of the segments.

As you can see, the original design had three full rectangles in the smaller sections with its edges dying into the posts.  Visually it looked fine, but it was not practical when it came to the cuts it would require to achieve the half ‘X’ into each post.

Taking those basics into account, I was now aware that the six small segments would fit three ‘X’ rectangles and the decorative flower portion would not be usable in the layout as the posts currently stand. Those parameters narrowed it down fairly quickly and was time to identify where each rail needed separated for our 3’-10” dimensions. 

Five out of six of the pieces were the same basic length and design, which made it a little easier in figuring out where to cut and what would be leftover.

Due to having seven openings on the portico roof, at least one of the small sides would be almost entirely fabricated out of these leftover pieces. The remaining extras would be added to build up the larger eight-foot centerpiece.

Along with the leftover pieces, extra steel was ordered that would be necessary to replicate that portions our extra pieces wouldn’t cover. I needed some more flat steel that runs across the bottom horizontally as well as more 1” square steel that makes up the thicker outer vertical pieces on the ends.

Each rectangle was about one foot, so three of them added up to three feet and we needed to fit a 3’-10” gap. The 1” square steel would be replicated to look like each piece had two runs of the thick vertical steel as shown in the gallery below.

The gallery shows some photos of the original rail as well each page of the design indicating what is to be kept, what's to be added and what's to be purchased and inserted.

Now that the theory of all of this is done, it’s time to start cutting. Check back next week to see the next step in the process. 

This blog topic will be broken into several posts to avoid confusion. Next week will feature the deconstruction of the rails as well as the process of rebuilding them. 


How to Rebuild a Landscaping Trailer Part #2

How to Rebuild a Landscaping Trailer Part #2

Last week we debuted our first welding project, which was the restoration of an old flatbed trailer and converting it into an all-purpose load-carrying trailer. We walked through all the preliminary steps and some of our new welding knowledge, so now here are the remaining steps we took to complete our very functional and often overused trailer.

Read More

How to Rebuild A Landscaping Trailer Part #1

How to Rebuild A Landscaping Trailer Part #1

As the Special Projects Manager in our office, I was hired to perform a multitude of projects that included everything from welding and constructing to designing and editing. Within my first few months of working on special projects, I was given a project of rehabbing a landscaping pull-behind trailer and converting it into a more stable, typical trailer with side rails and a fortified rear operable gate. 

Read More